This article explains how Internet Gateways provide internet access for subnets in an AWS VPC, converting private subnets into public ones.
In this lesson, we'll explore how Internet Gateways enable internet access for subnets in an Amazon Virtual Private Cloud (VPC), effectively converting private subnets into public ones.
By default, all newly created subnets are private: instances cannot reach the internet, nor can external clients initiate connections to them. Attaching an Internet Gateway to your VPC and updating route tables provides the necessary ingress and egress paths for internet communication.
Key Characteristics of Internet Gateways
| Feature | Description |
|---|---|
| Attachment Limit | One Internet Gateway per VPC |
| VPC Association | An Internet Gateway can only be attached to a single VPC at a time |
| High Availability | Region-resilient across all Availability Zones |
Steps to Make a Subnet Public
- Create an Internet Gateway
bash theme={null} aws ec2 create-internet-gateway - Attach the Internet Gateway to Your VPC
bash theme={null} aws ec2 attach-internet-gateway \ --internet-gateway-id igw-0123456789abcdef0 \ --vpc-id vpc-0abcdef1234567890 - Create a Custom Route Table
bash theme={null} aws ec2 create-route-table --vpc-id vpc-0abcdef1234567890 - Add a Default Route (
0.0.0.0/0)\ Point to the Internet Gateway:bash theme={null} aws ec2 create-route \ --route-table-id rtb-0abcdef1234567890 \ --destination-cidr-block 0.0.0.0/0 \ --gateway-id igw-0123456789abcdef0 - Associate the Public Subnet with the Custom Route Table
bash  theme={null}
   aws ec2 associate-route-table \
     --subnet-id subnet-01234abcde5678fgh \
     --route-table-id rtb-0abcdef1234567890
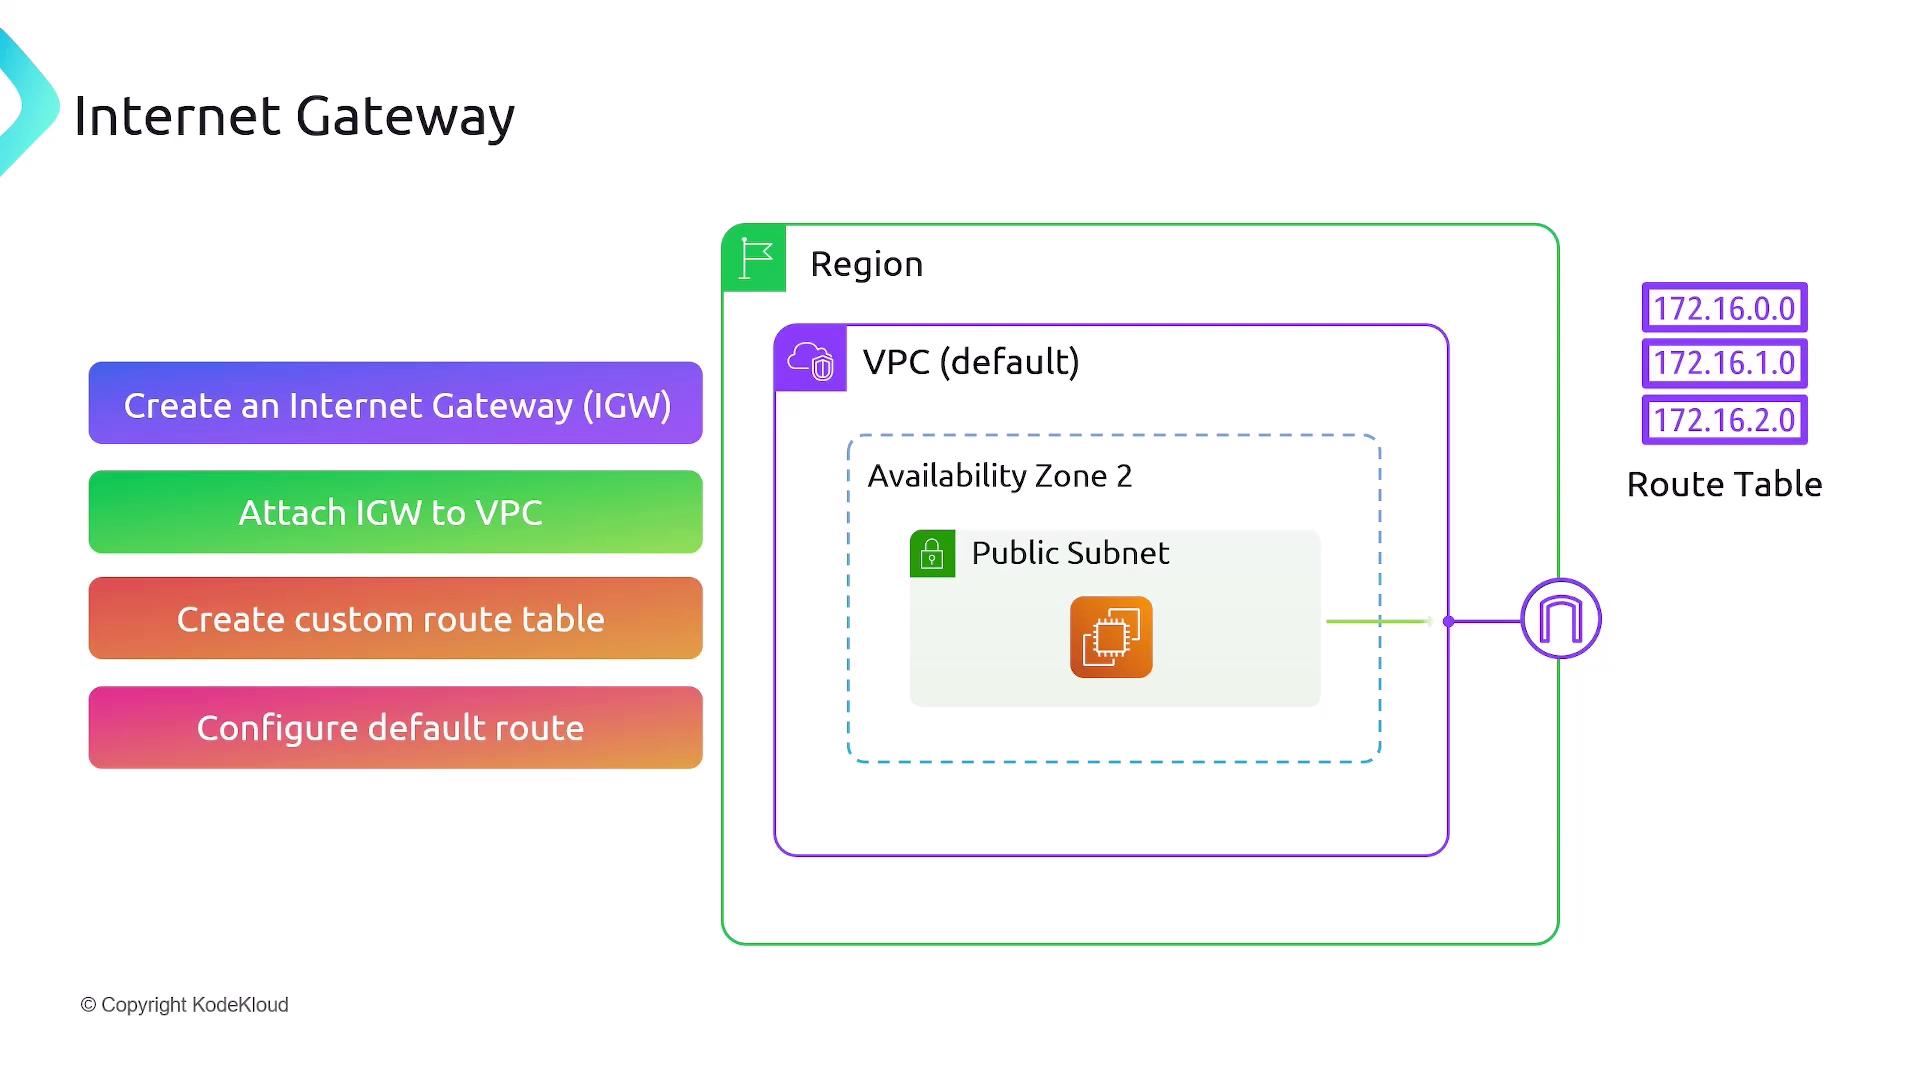
The default route (0.0.0.0/0 → igw-xxxxxxxx) ensures that any traffic not matching more specific routes is forwarded to the Internet Gateway. Associating your subnet with this route table makes it a public subnet, enabling instances to send and receive internet traffic.
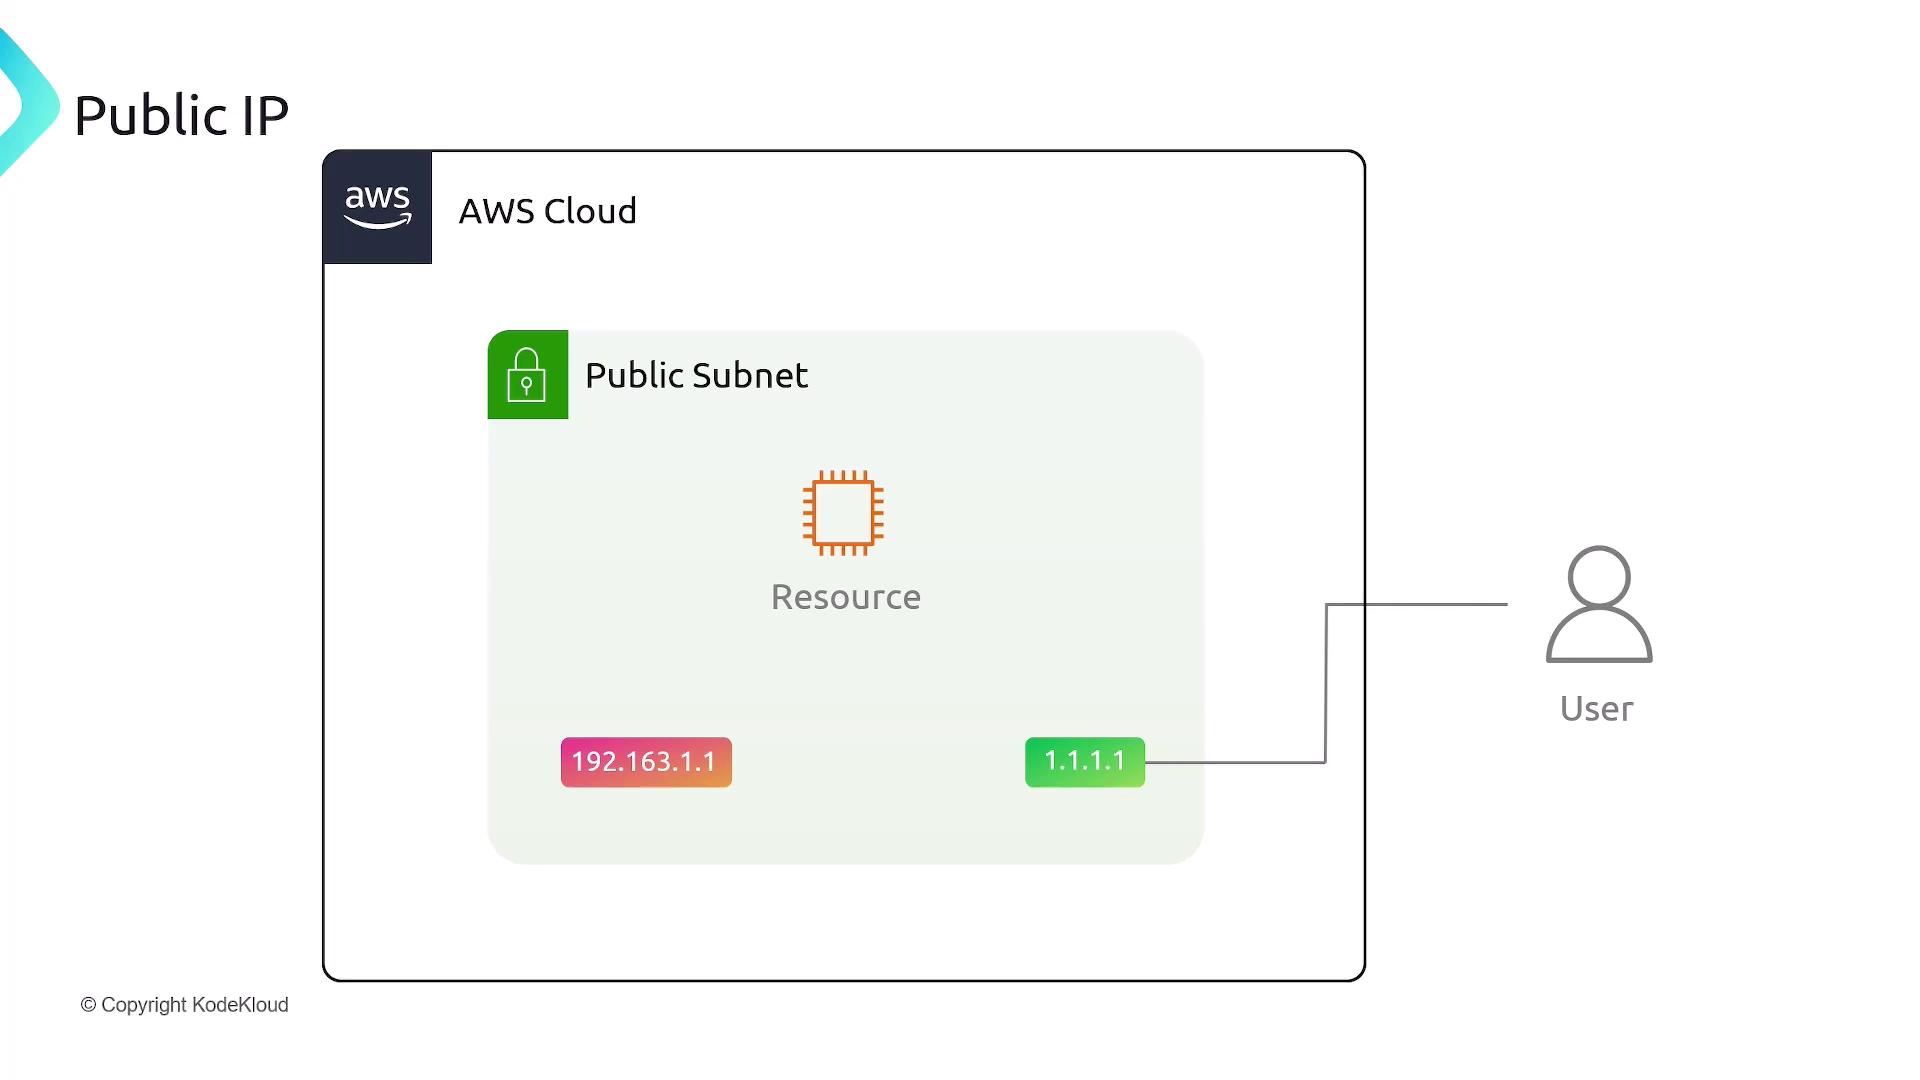
Public IP Assignment
Instances in a public subnet only receive a private IP address (e.g., 192.168.1.1) by default. To allow access from the internet, enable Auto-assign Public IPv4 address on the subnet or assign a public IP when launching the instance. This allocates a public IP (e.g., 1.1.1.1) and automatically maps it to the private IP.
From the instance’s perspective:
- Incoming requests target the public IP.
- AWS Network Address Translation (NAT) translates the public IP to the instance’s private IP.
- The instance processes traffic using its private IP, unaware of the public endpoint.
If an instance has multiple Elastic Network Interfaces (ENIs), each interface can have its own public IP address mapped to a private IP. AWS uses these mappings to direct internet traffic to the correct interface.
Summary
| Summary Point | Details |
|---|---|
| Purpose of Internet Gateway | Provides a path for internet traffic into and out of your VPC |
| Attachment Rules | One Internet Gateway per VPC; one VPC per Internet Gateway |
| Public Subnet Requirement | Route table must include a default route pointing to the Internet Gateway |
| Public IP for External Accessibility | Instances need a public IPv4 address (auto-assigned or manually added) |
References
Quand on créer un subnet par défault il est private (Ce qui est créer dans le subnet n'as pas accès à internet) Il faut créer une internetGateway attach to vpc couvre toutes les AZ public associate to the private ip of the instances/object
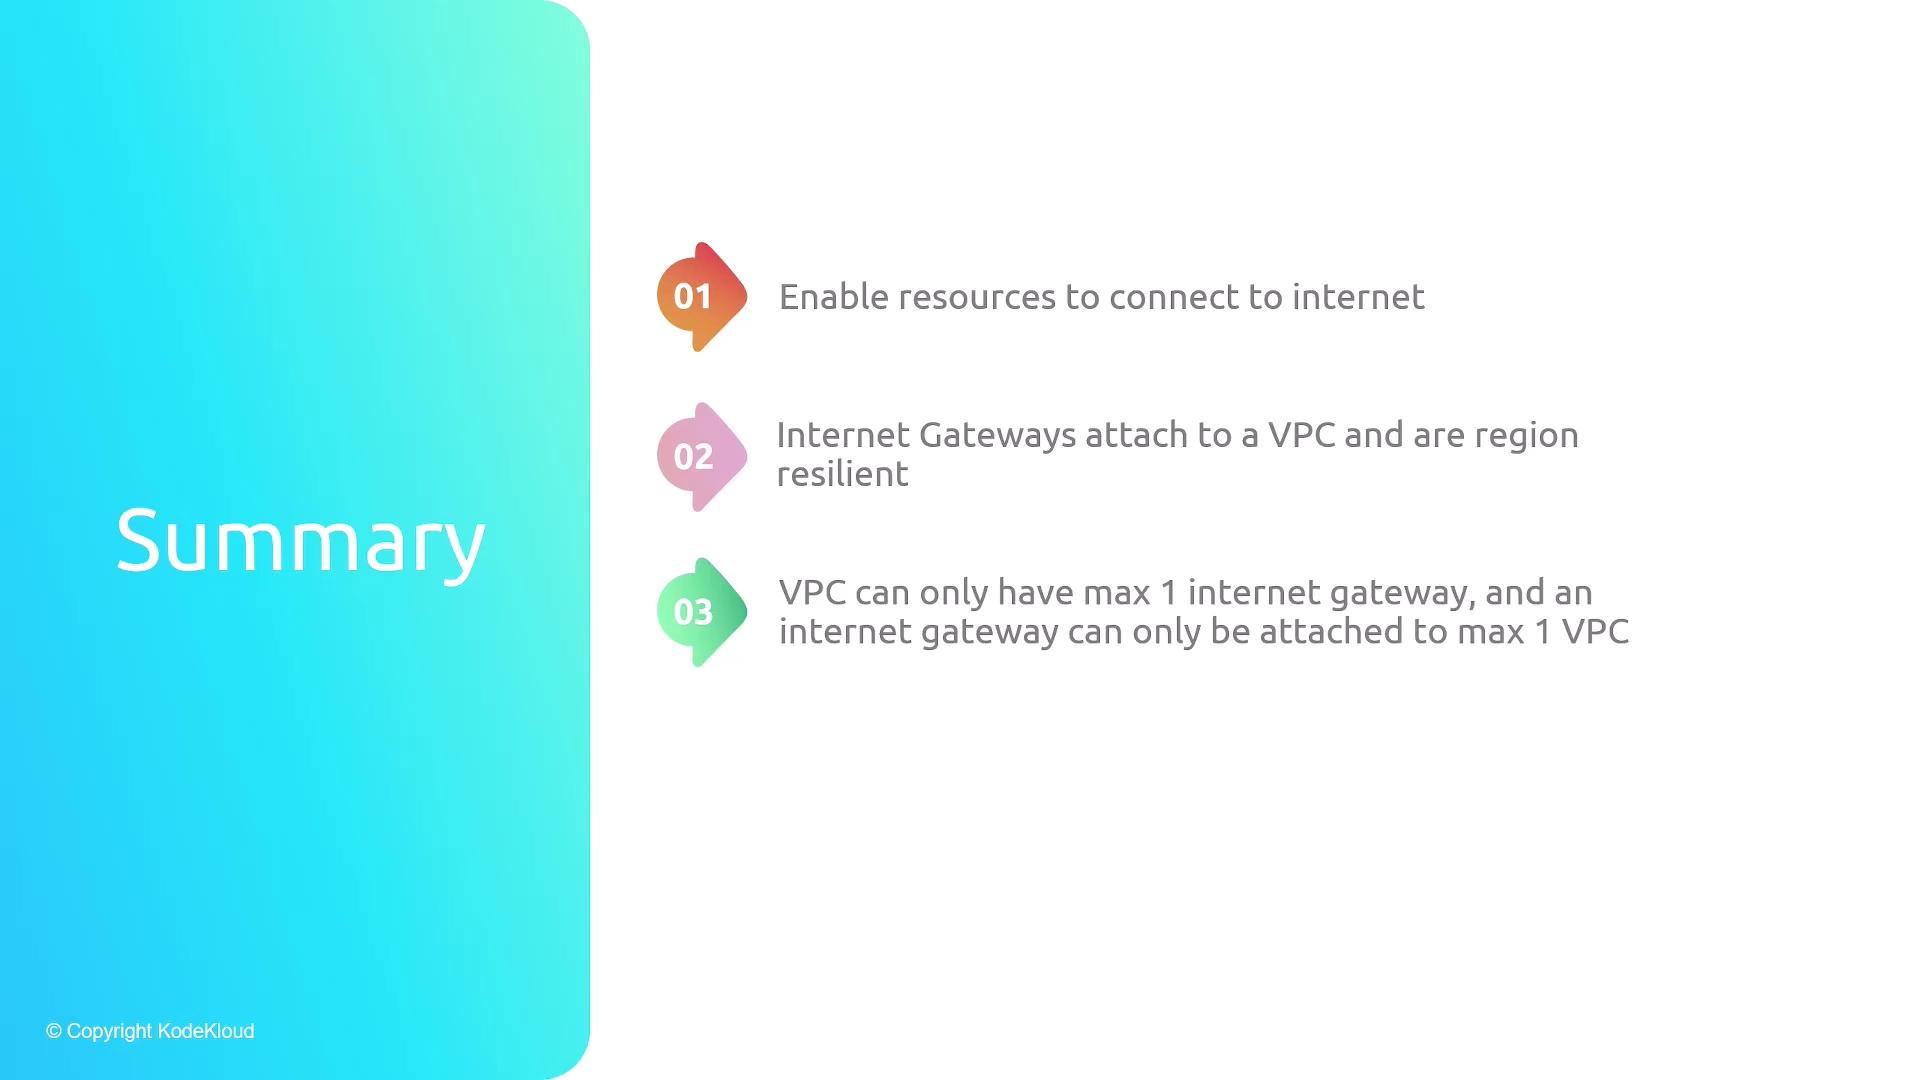
- Enable resources to connect to internet
- Internet Gateways attach to a VPC and are region resilient
- VPC can only have max 1 internet gateway, and an internet gateway can only be attached to max 1 VPC
- A subnet is made public once a default route points to the internet gateway in the VPC
This tutorial explains how to convert a private subnet into a public subnet by attaching an Internet Gateway and updating the route table.
In this tutorial, you’ll convert a private subnet into a public subnet by attaching an Internet Gateway and updating the route table. After completing these steps, any EC2 instance launched in your public subnet will have Internet access.
Overview
| Step | Description |
|---|---|
| 1 | Create a VPC & Subnet |
| 2 | Launch an EC2 instance in the public subnet |
| 3 | Verify default connectivity (should fail) |
| 4 | Create & attach an Internet Gateway |
| 5 | Configure the route table for Internet access |
| 6 | Test Internet connectivity (should succeed) |
Prerequisites
- An AWS account with permissions to manage VPCs and EC2.
- A generated SSH key pair (for example,
aws-demo.pem).
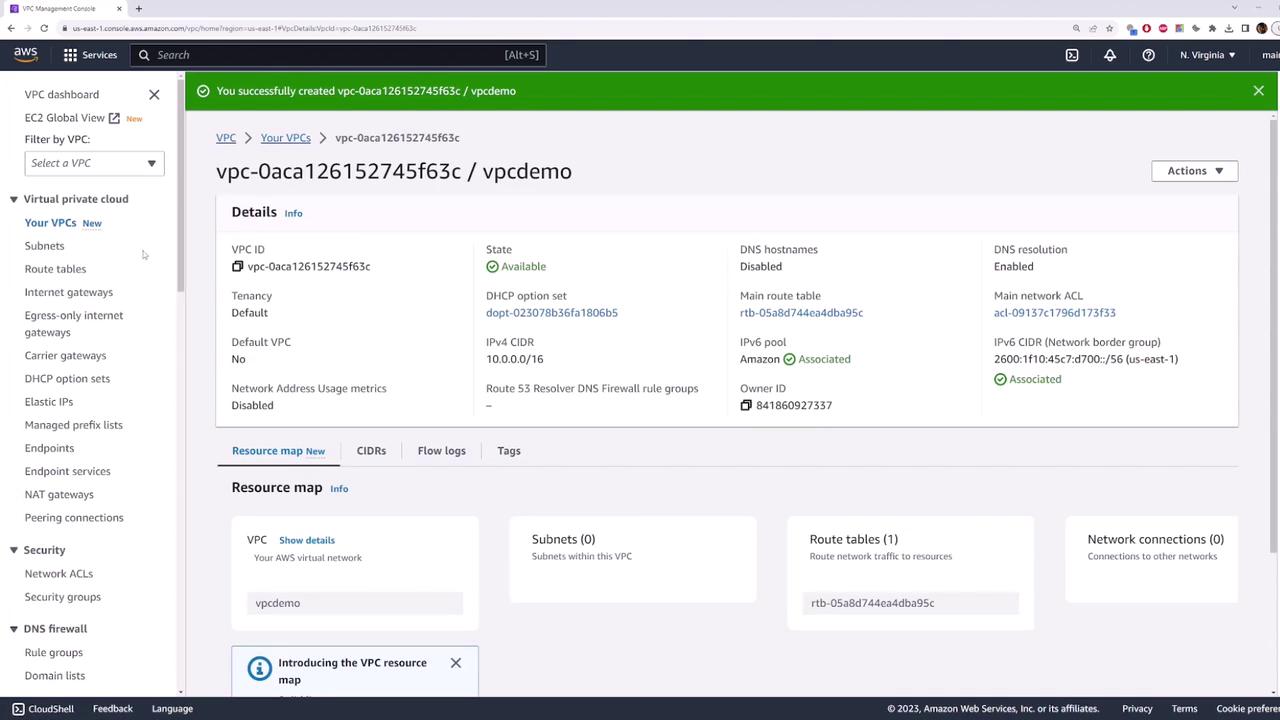
1. Create a VPC and Public Subnet
- In the AWS Console, go to VPC > Your VPCs and click Create VPC.
- Set the IPv4 CIDR block to
10.0.0.0/16. Optionally add an IPv6 block. - Click Create VPC.
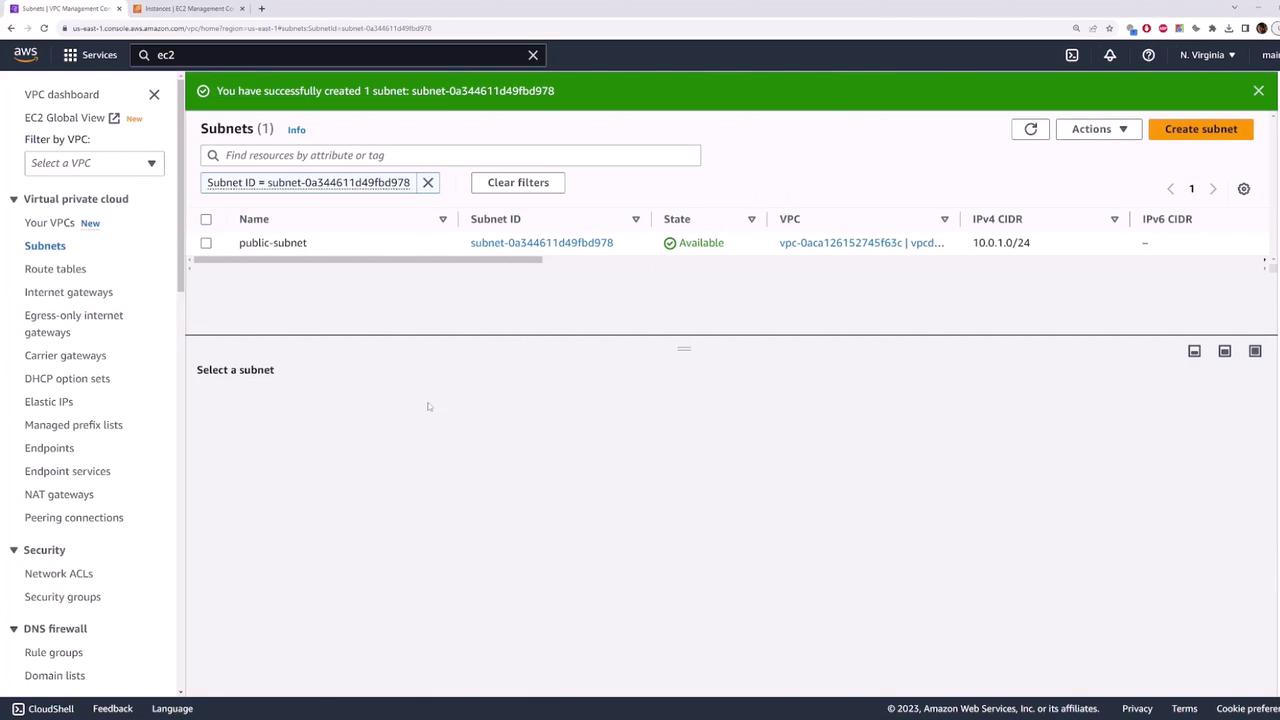
- Navigate to Subnets > Create subnet:
- Name tag:
public-subnet - VPC: your newly created VPC
- IPv4 CIDR block:
10.0.1.0/24 - Click Create subnet.
2. Launch an EC2 Instance in the Public Subnet
- Open EC2 Console > Instances > Launch instances.
- For Name, enter
my-public-server. - Choose Amazon Linux 2023 under Application and OS Images (AMI).
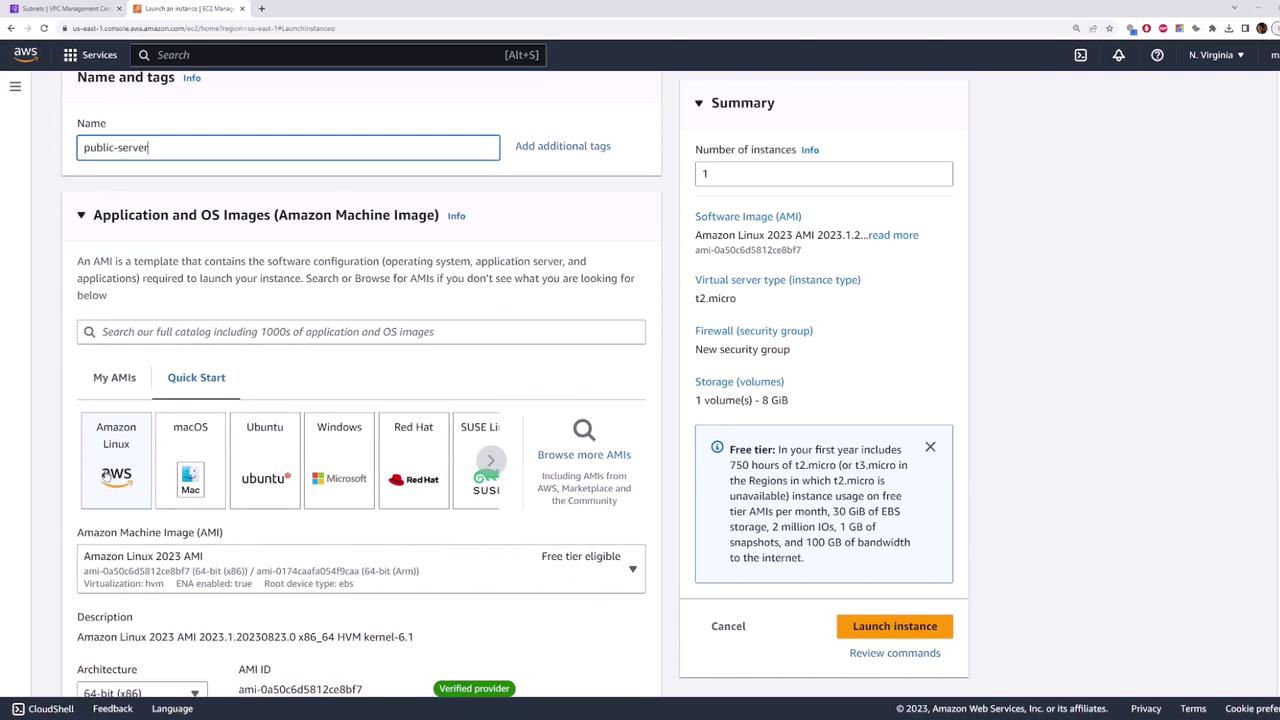
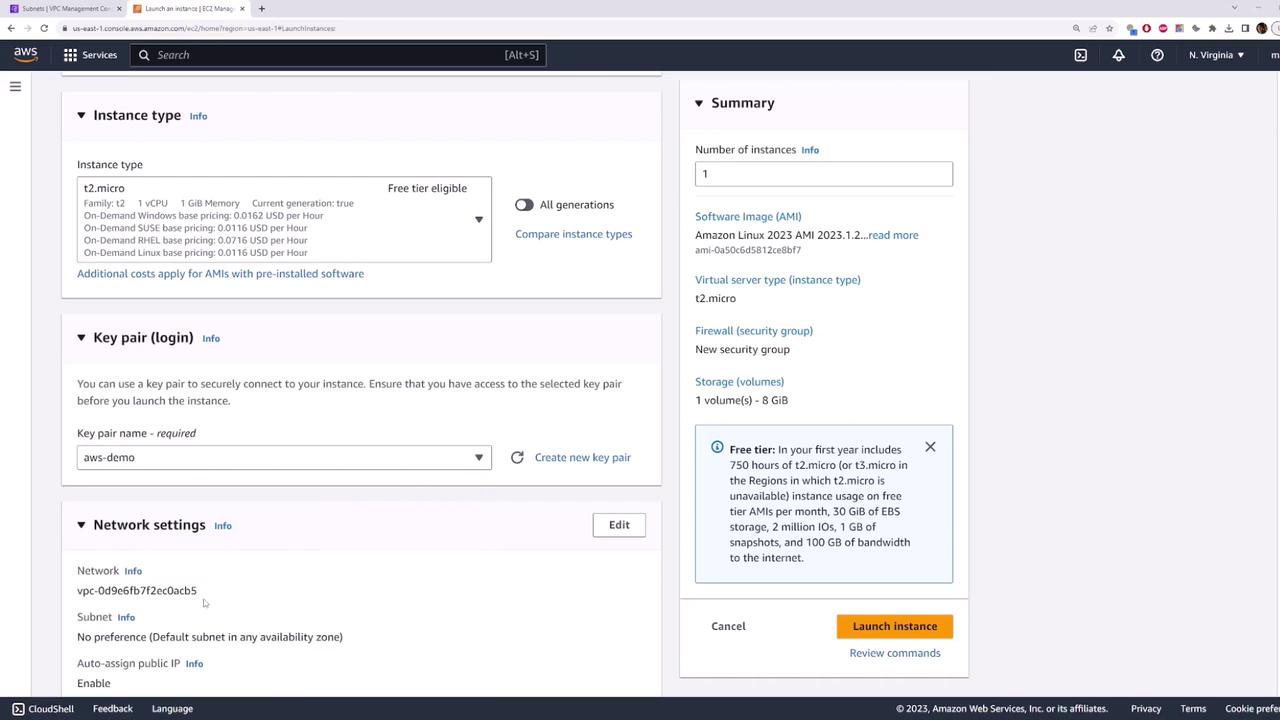
- Select the t2.micro instance type (free tier).
- Under Key pair, choose
aws-demo.pem. - Expand Network settings > Edit and configure:
- VPC: your new VPC
- Subnet:
public-subnet - Auto-assign public IP: Enable
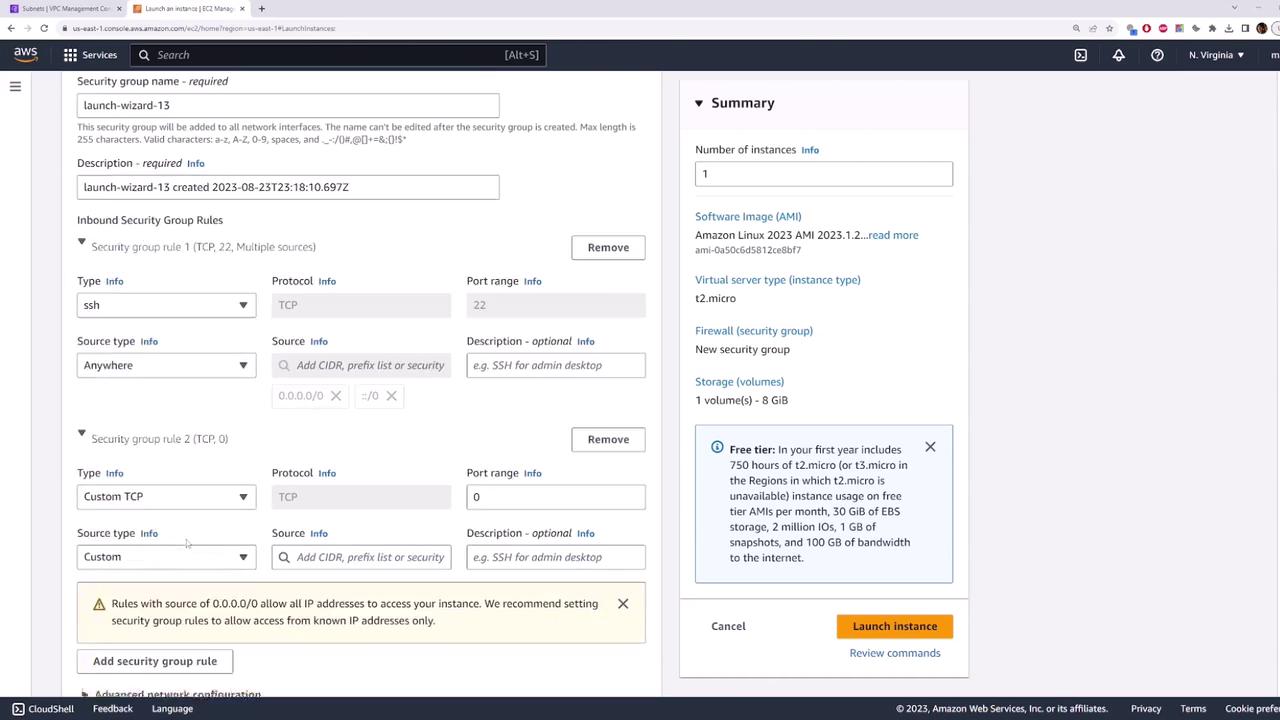
- Under Security group, allow SSH (port 22) from
0.0.0.0/0. Optionally add ICMP for ping.
- Click Launch instance and wait for it to switch to running.
3. Verify Default Connectivity (Should Fail)
After your instance is running, copy its public IP (example: 54.159.89.36) and test connectivity:
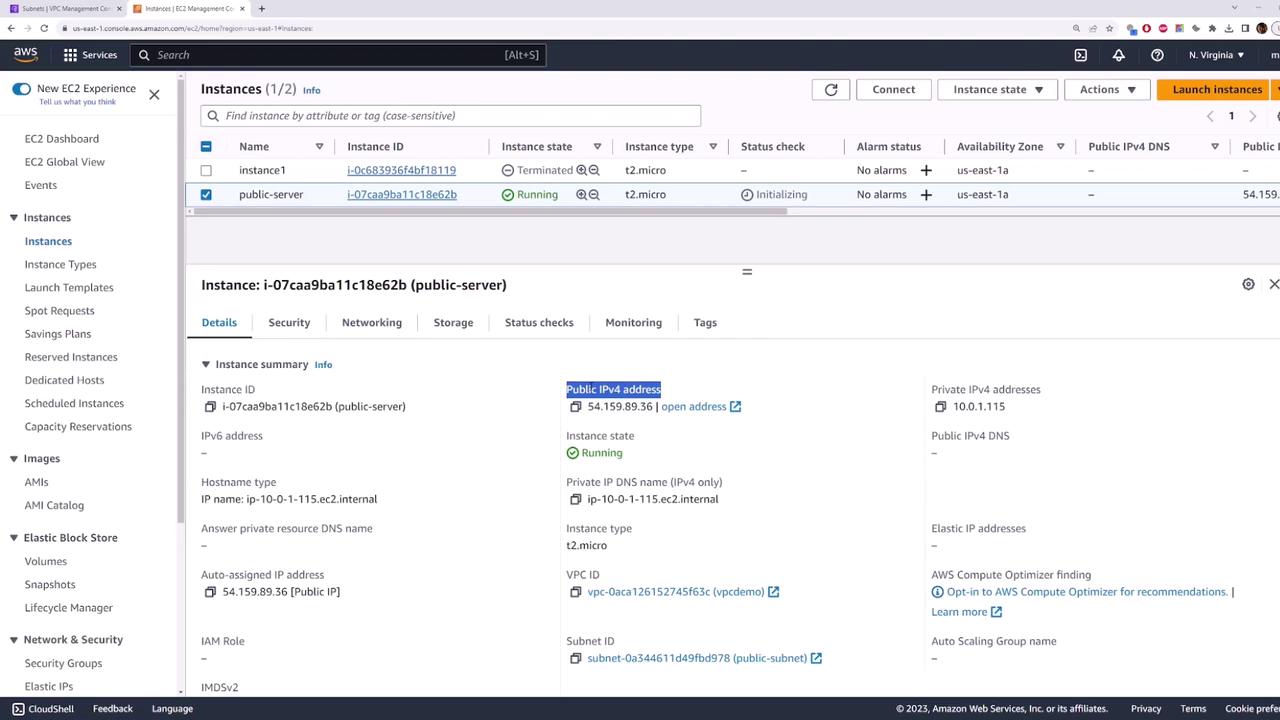
```bash theme={null} ping 54.159.89.36 ssh -i aws-demo.pem ec2-user@54.159.89.36
Connection hangs.
By default, there’s no Internet route, so the instance remains unreachable despite having a public IP.
***
## 4. Create and Attach an Internet Gateway
1. In the **VPC Console**, select **Internet Gateways** and click **Create internet gateway**.
* **Name tag**: `my-internet-gateway`
2. Click **Create internet gateway**.
3. Select the newly created gateway, choose **Actions > Attach to VPC**, and select your VPC.
<Frame>
</Frame>
<Frame>
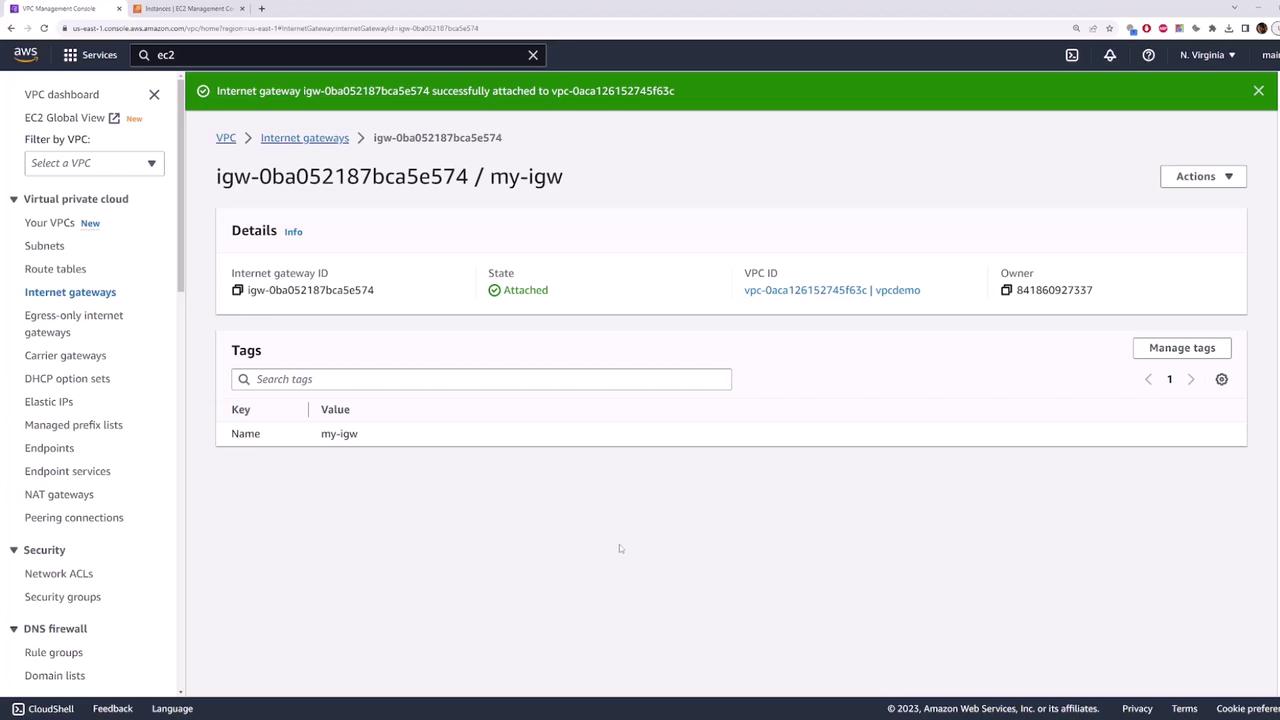
</Frame>
> Pinging still fails because the route table isn’t updated yet.
***
## 5. Configure the Route Table for Internet Access
1. Go to **VPC > Route Tables** and click **Create route table**.
* **Name tag**: `public-route-table`
* **VPC**: your demo VPC
2. Click **Create route table**.
3. Select the new route table, open **Subnet associations**, click **Edit subnet associations**, check `public-subnet`, and save.
<Frame>
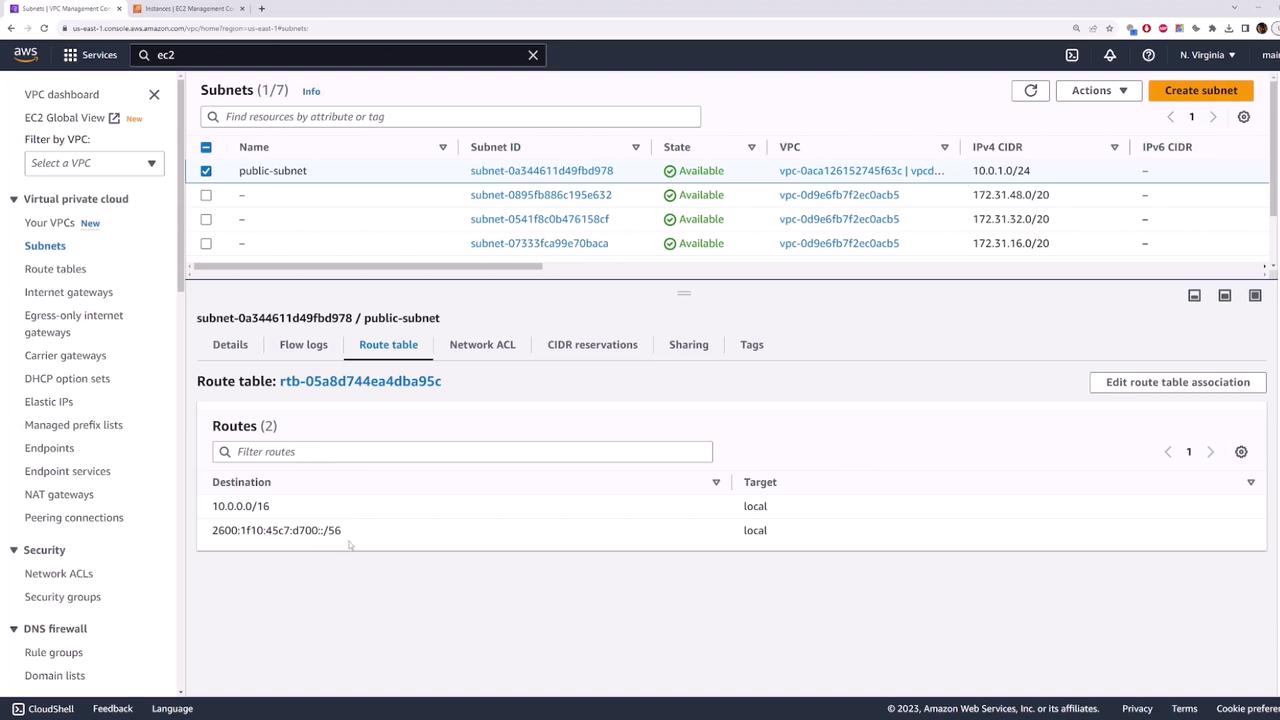
</Frame>
4. In the **Routes** tab, click **Edit routes** > **Add route**:
* **Destination**: `0.0.0.0/0`
* **Target**: `my-internet-gateway`
5. Save the route.
<Frame>
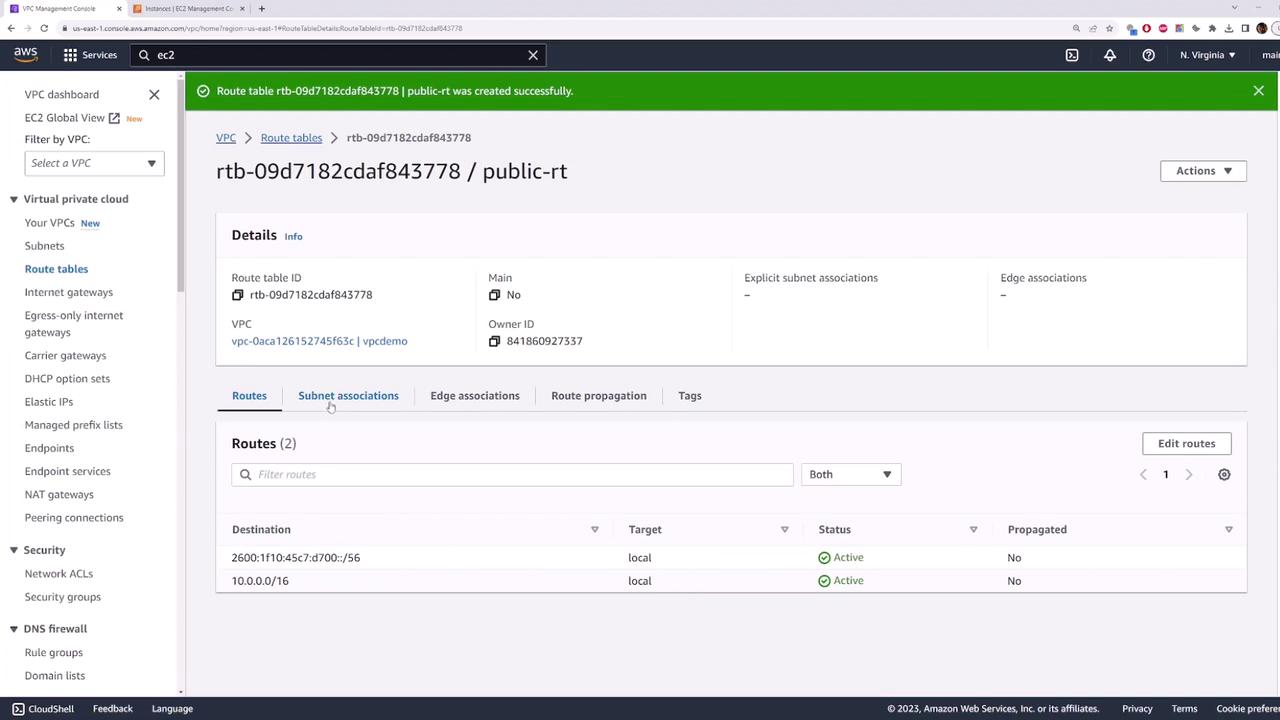
</Frame>
***
## 6. Test Internet Connectivity (Should Succeed)
Now retry ping and SSH using the public IP:
```bash theme={null}
ping 54.159.89.36
ssh -i aws-demo.pem ec2-user@54.159.89.36
# Welcome to your public EC2 instance!
Congratulations! Your public-subnet is now internet-enabled, and any EC2 instances launched into it can be accessed from the Internet.