CloudFront
This article explains Amazon CloudFront, a CDN that enhances content delivery speed and reliability through edge caching and origin failover.
In this lesson, we dive into Amazon CloudFront—a powerful Content Delivery Network (CDN) that reduces latency and accelerates both static and dynamic content. Learn how edge caching, TTL management, and origin failover work together to deliver fast, reliable experiences for users worldwide.
The Latency Challenge
When your web application resides in a single AWS Region (for example, us-east-1 in New York), users nearby see quick responses, but those thousands of miles away suffer high round-trip times. Slow page loads, video buffering, and large downloads frustrate end users.
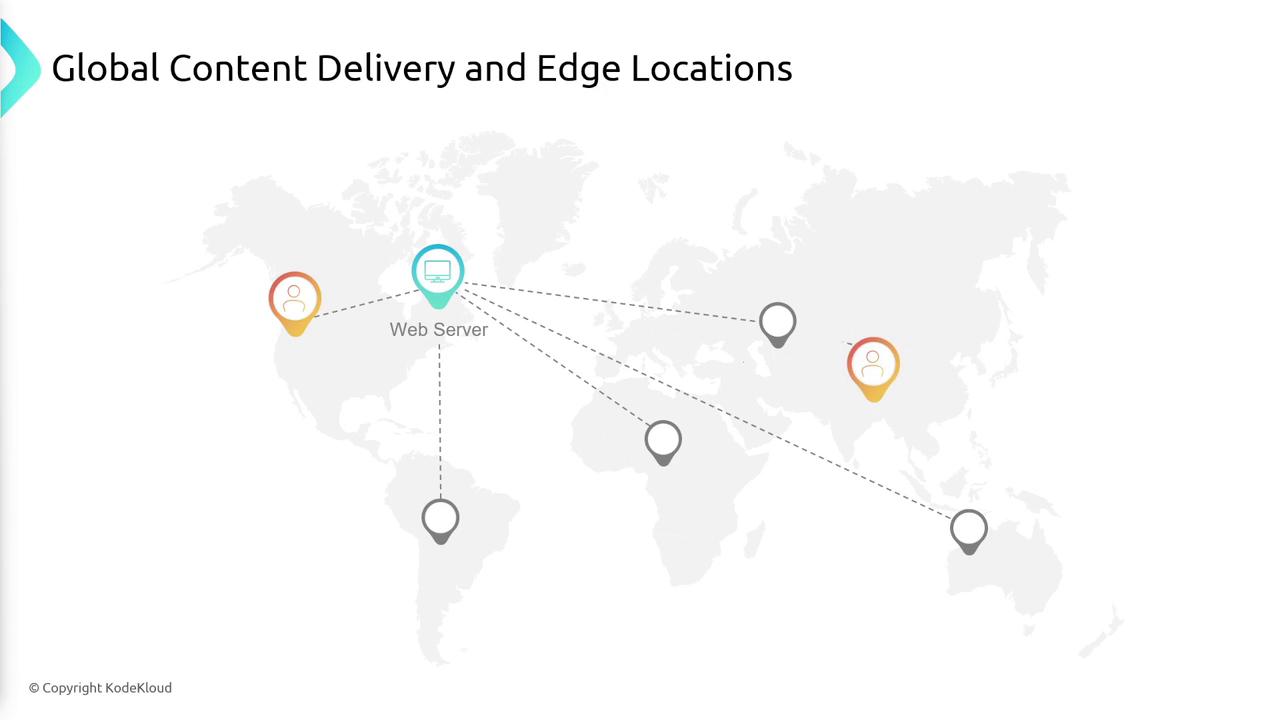
By deploying dozens of edge locations around the globe, CloudFront brings content closer to your users, slashing latency and improving performance.
What Is CloudFront?
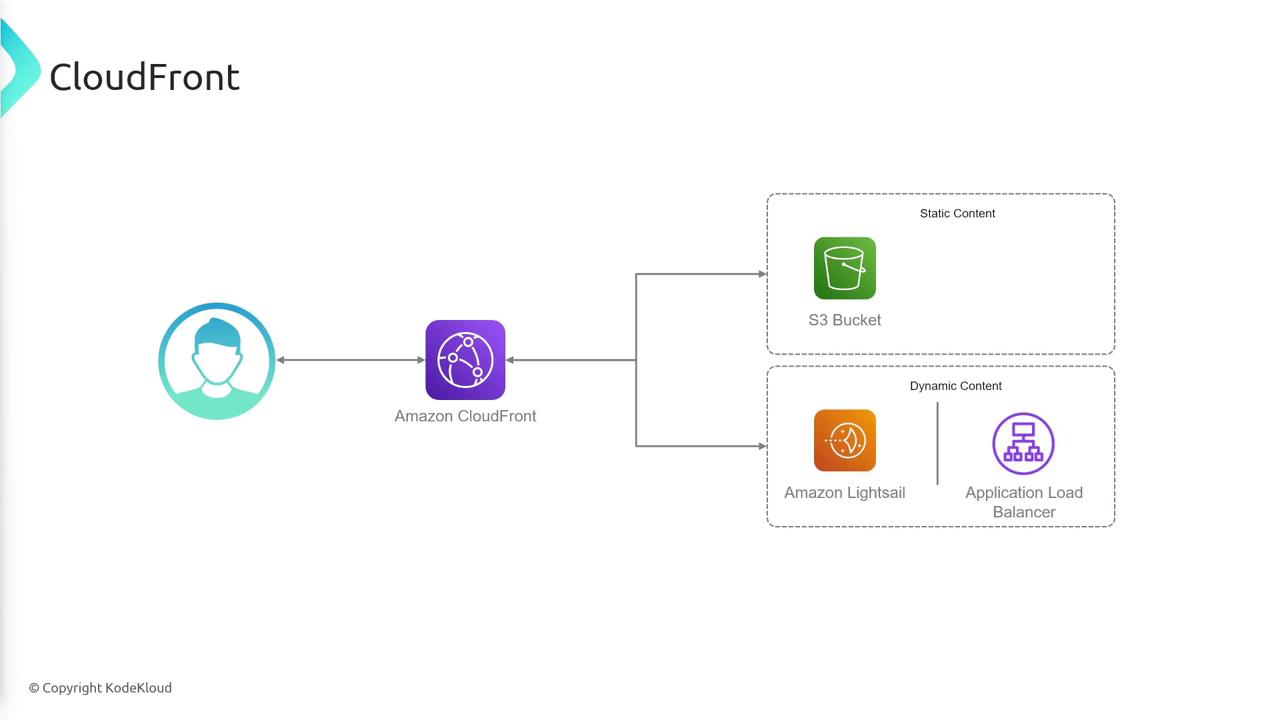
Amazon CloudFront is AWS’s global CDN service. It delivers your web assets—HTML, CSS, JavaScript, images, videos, APIs, and dynamic content—via a worldwide network of edge caches. Instead of every user request going back to your origin server, CloudFront routes traffic to the nearest edge location.
Core Components
| Component | Description |
|---|---|
| Origin | The source of your content: S3 bucket, EC2/On-Prem HTTP server, Elastic Load Balancer, etc. |
| Distribution | Configuration that links one or more origins to CloudFront; provides a unique domain name. |
| Edge Location | A global cache point where CloudFront stores and serves your objects. |
Distribution Workflow
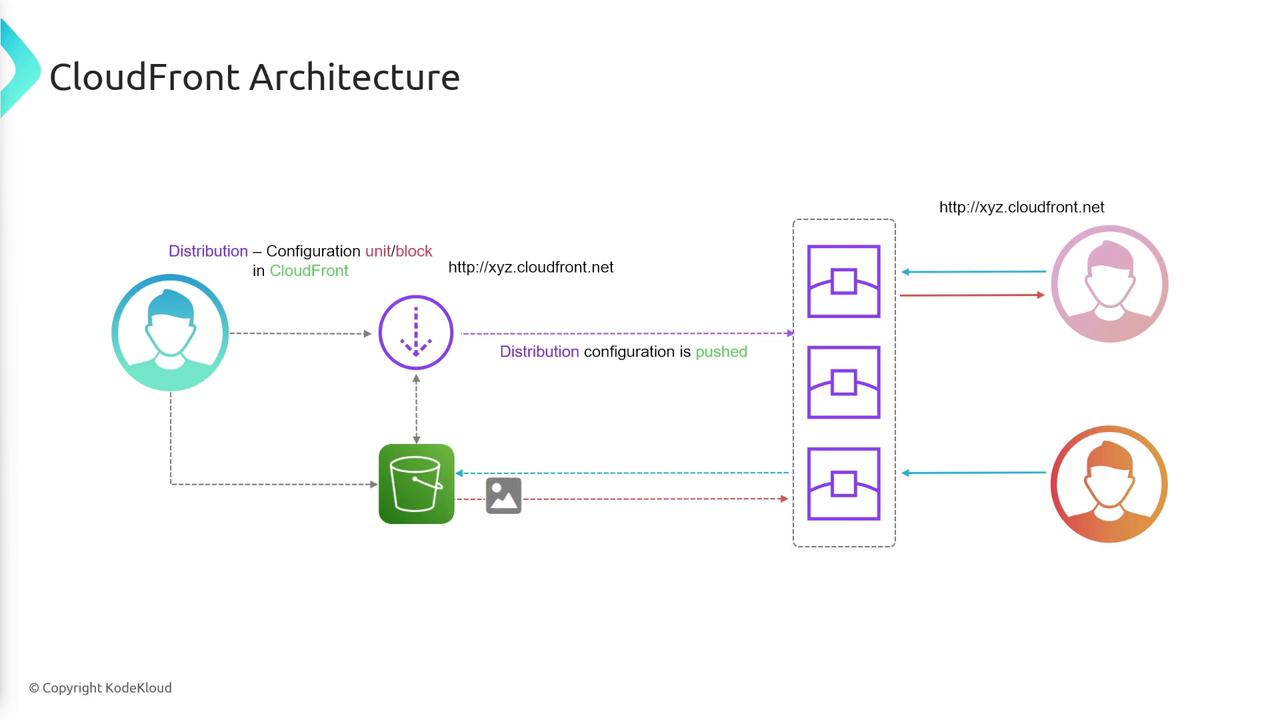
- User requests content from your
*.cloudfront.netdomain. - CloudFront routes to the nearest edge location.
- Cache Hit: Edge returns the object immediately.
- Cache Miss: Edge fetches from the origin, caches the response, then serves the user.
Origin Interaction Examples
S3 Bucket as Origin
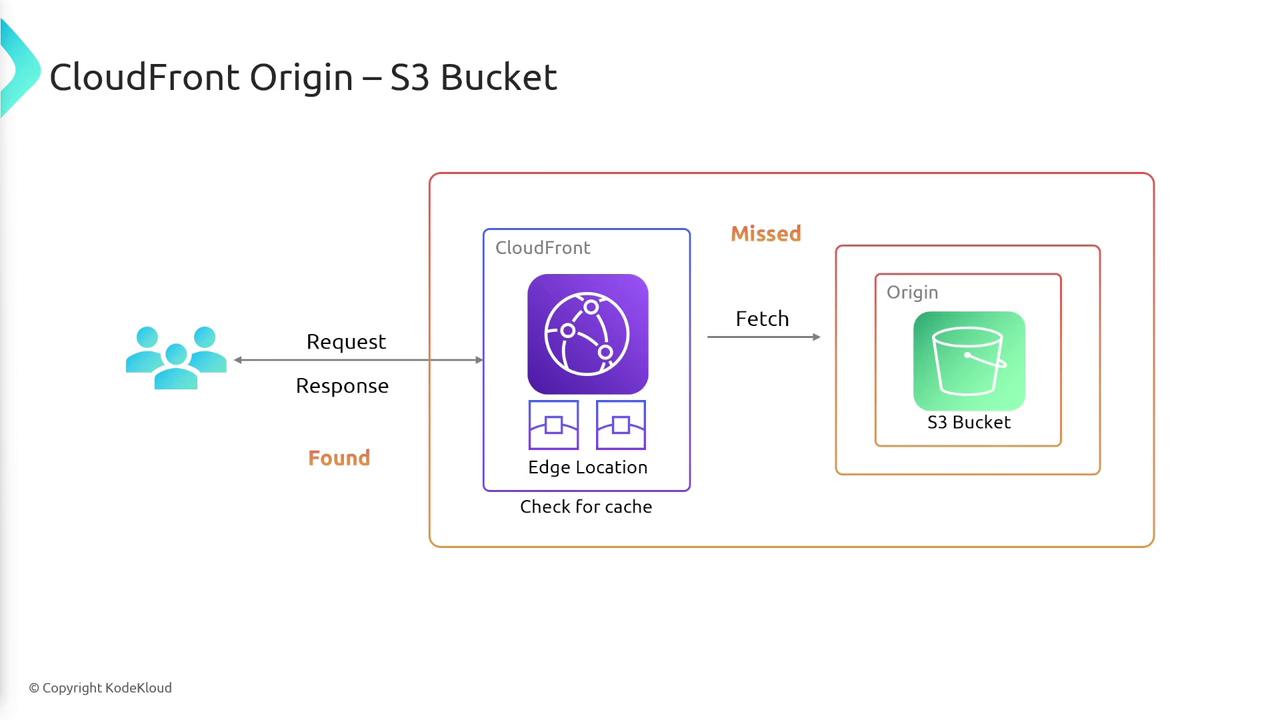
- User → CloudFront edge
- Edge: cache hit → serve directly
- Edge: cache miss → fetch from S3 → cache → serve
Custom HTTP Backend
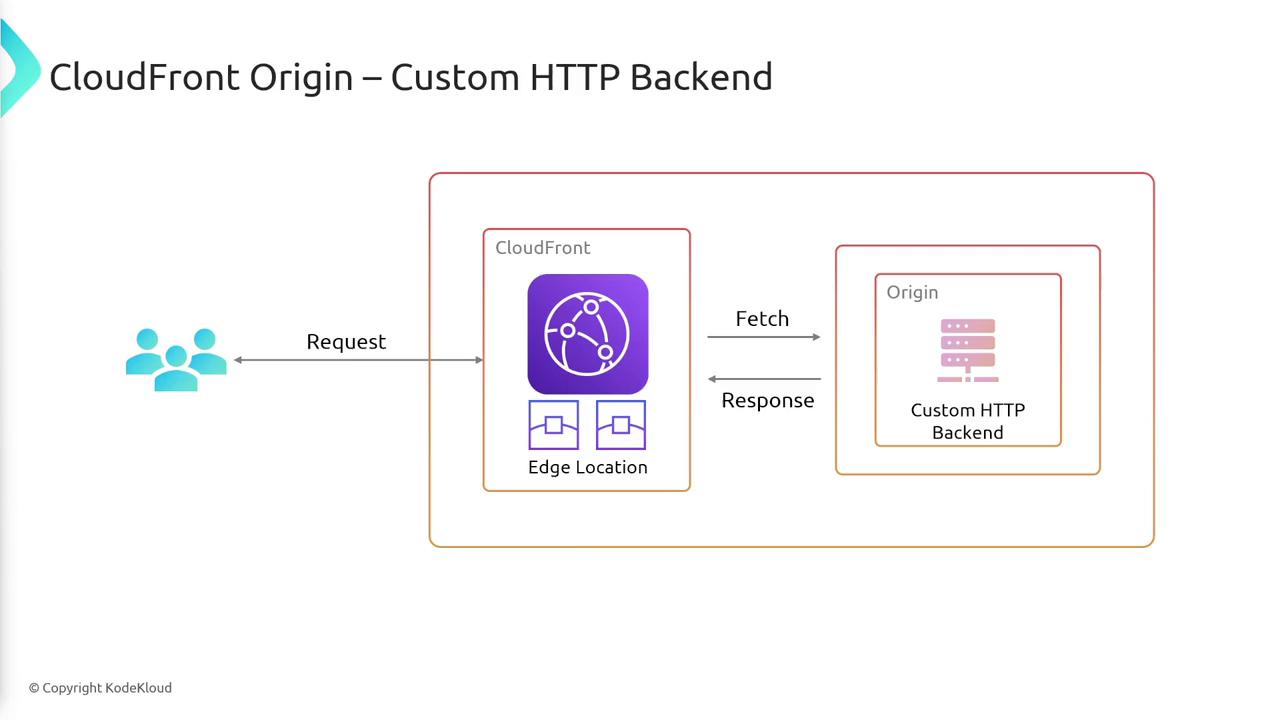
- User → CloudFront edge
- Edge: cache hit → serve content
- Edge: cache miss → fetch from your HTTP server → cache → serve
Cache Expiration (TTL)
Each cached object at an edge location lives for its Time To Live (TTL). Once TTL expires, the object is evicted and a new request triggers an origin fetch.
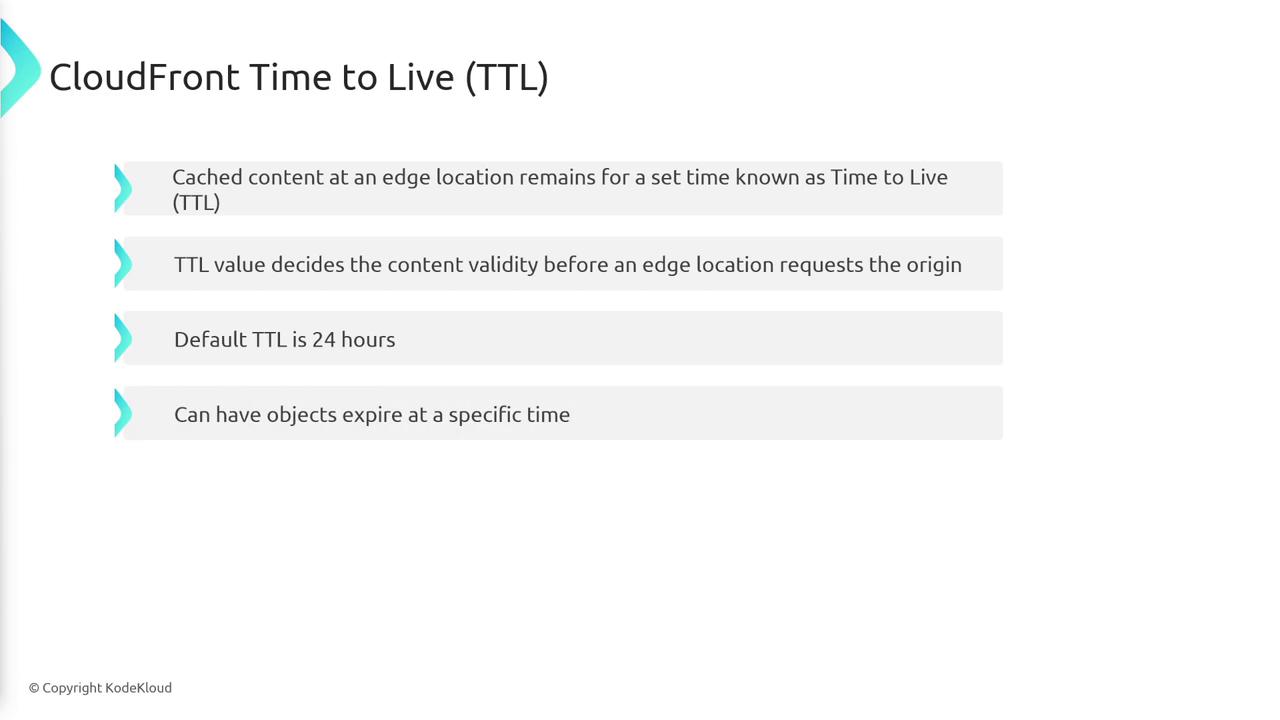
- Default TTL: 24 hours
- Customize per object or set absolute expiration timestamps
Cache Invalidation
Updating assets before their TTL expires requires explicit cache invalidation. Otherwise, edge locations will continue to serve the old version.
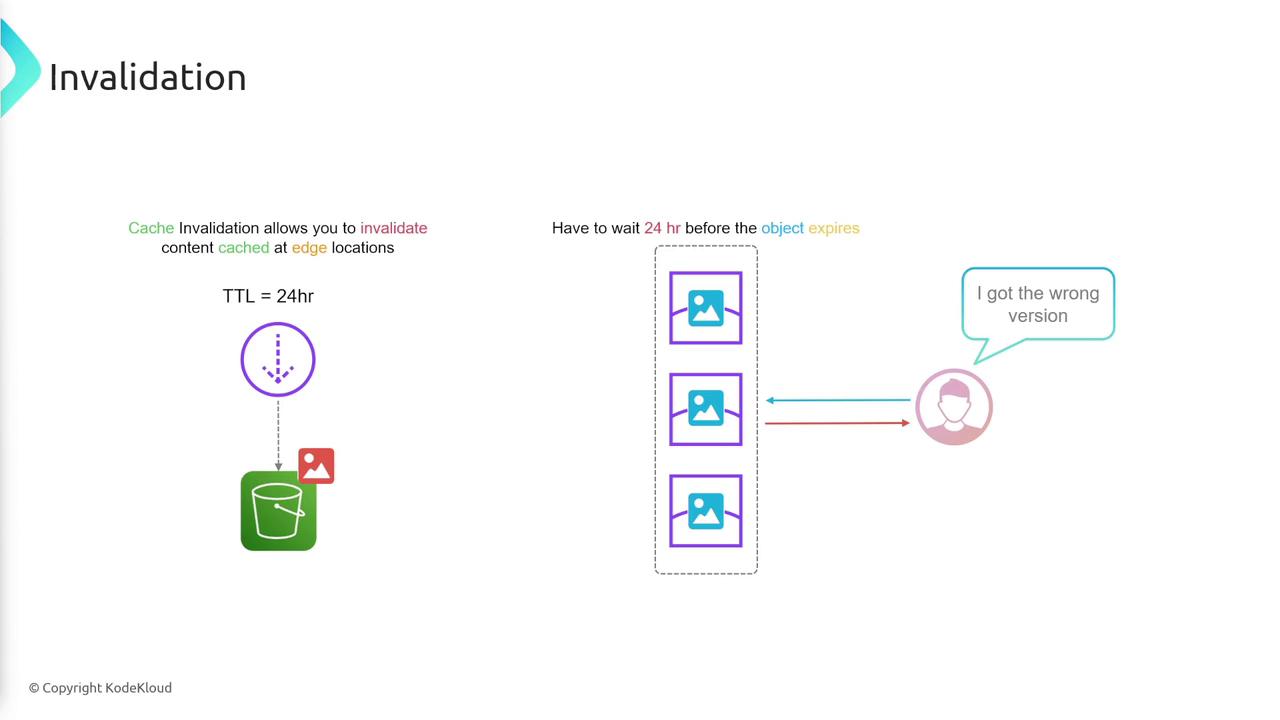
Invalidation process
- Submit invalidation for the object path (e.g.,
/images/logo.png). - Edge caches remove the object.
- Next request → origin fetch → cache updated → user gets the new version.
Origin Groups for High Availability
CloudFront origin groups let you specify a primary and secondary origin. If the primary fails (for example, 5xx errors or timeouts), CloudFront automatically retries against the secondary, ensuring uninterrupted service.
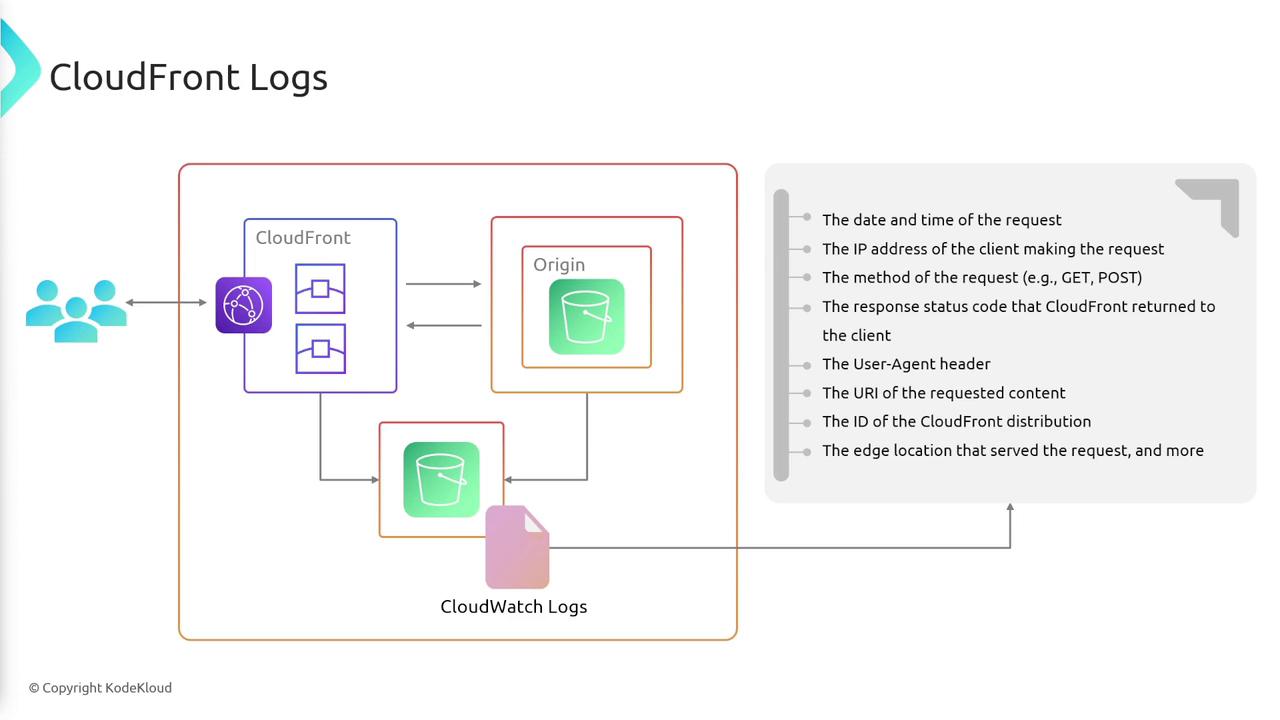
Logging and Monitoring
CloudFront can publish detailed logs to Amazon S3, Amazon CloudWatch Logs, or third-party analytics tools. Logs include:
- Request timestamp
- Client IP address
- Requested object and HTTP method
- Response status code
Summary of CloudFront Features
- Global CDN: Edge caching for low-latency delivery
- Flexible Origins: S3, HTTP servers, load balancers
- Distributions: Custom configuration with domain name
- TTL & Invalidation: Fine-grained cache control
- Origin Groups: Automatic failover for high availability
- Logging: Insights into traffic patterns and errors
Links and References
This tutorial explains how to host a static website on AWS using S3 and accelerate it with CloudFront.
In this tutorial, we’ll walk through how to serve a simple static website (HTML, CSS, images) from Amazon S3 and accelerate it globally with Amazon CloudFront. You’ll learn how to:
- Set up an S3 bucket and upload your assets
- Secure S3 with a bucket policy for CloudFront access
- Create and configure a CloudFront distribution
- Customize caching behavior and invalidate objects
Prerequisites
- An AWS account with IAM permissions for S3 and CloudFront
- A local project folder containing:
index.htmlindex.cssimages/(your asset directory)
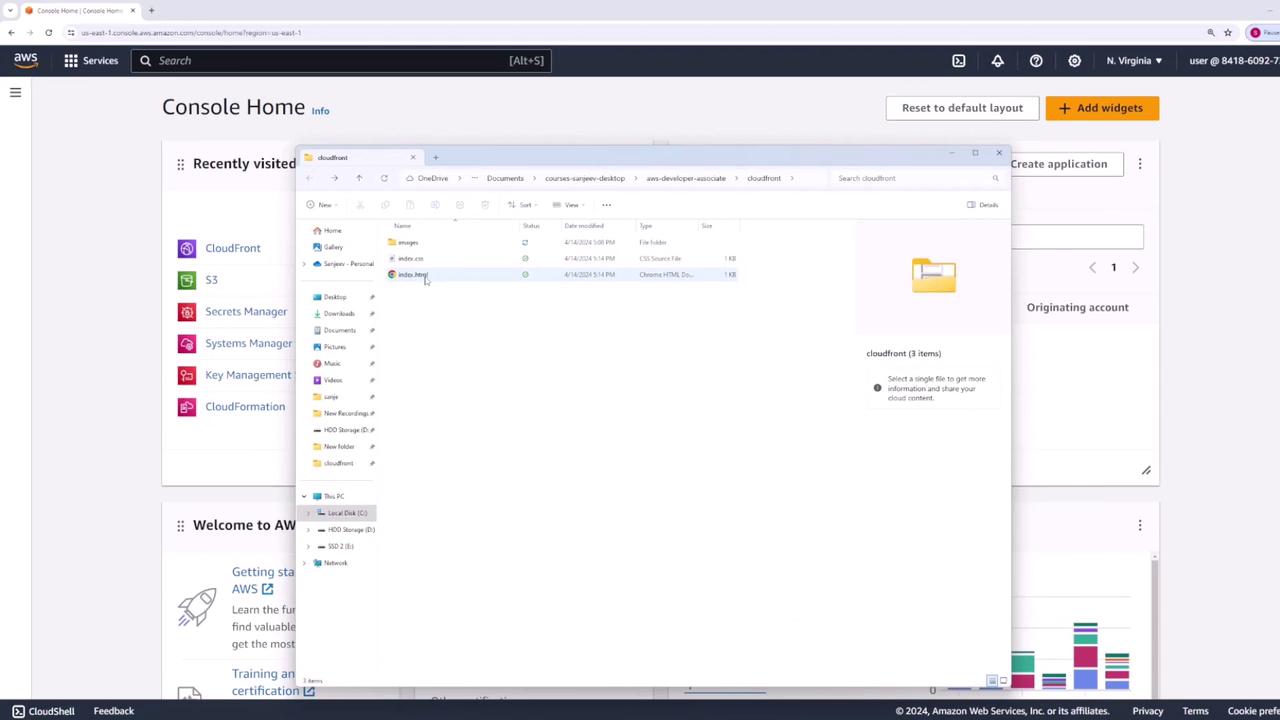
Project Structure
Here’s our local directory layout. It contains an HTML page, a CSS stylesheet, and an images folder:
All assets will reside in an S3 bucket. CloudFront will then cache these files at edge locations to minimize latency for end users.
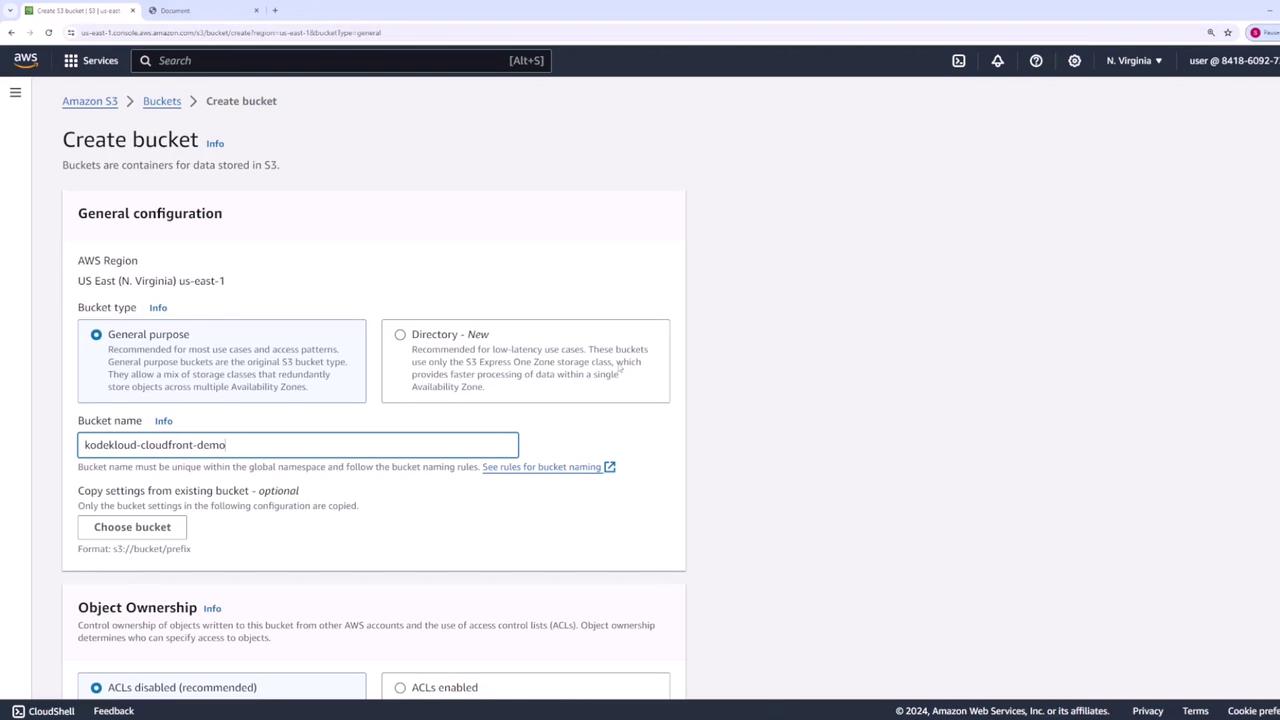
1. Create and Configure an S3 Bucket
- Open the Amazon S3 console, then click Create bucket.
- Enter a globally unique name (e.g.,
kodekloud-cloudfront-demo), leave other settings at their defaults, and click Create bucket.
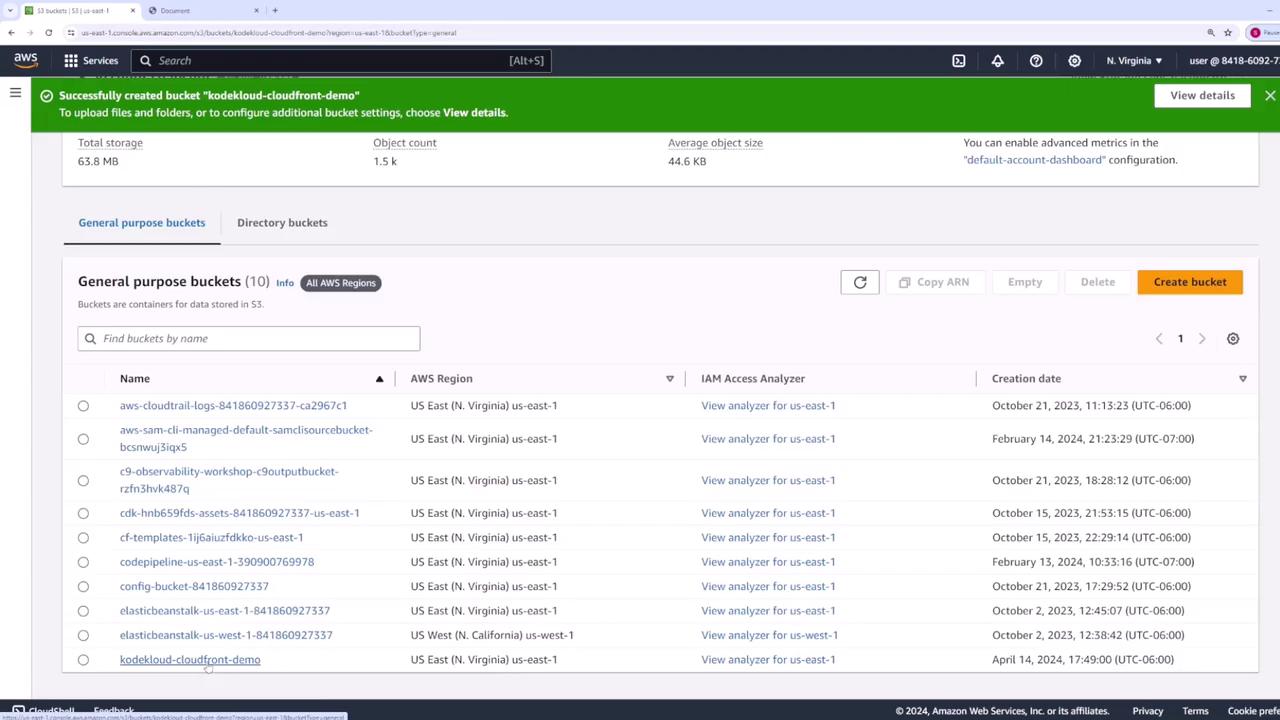
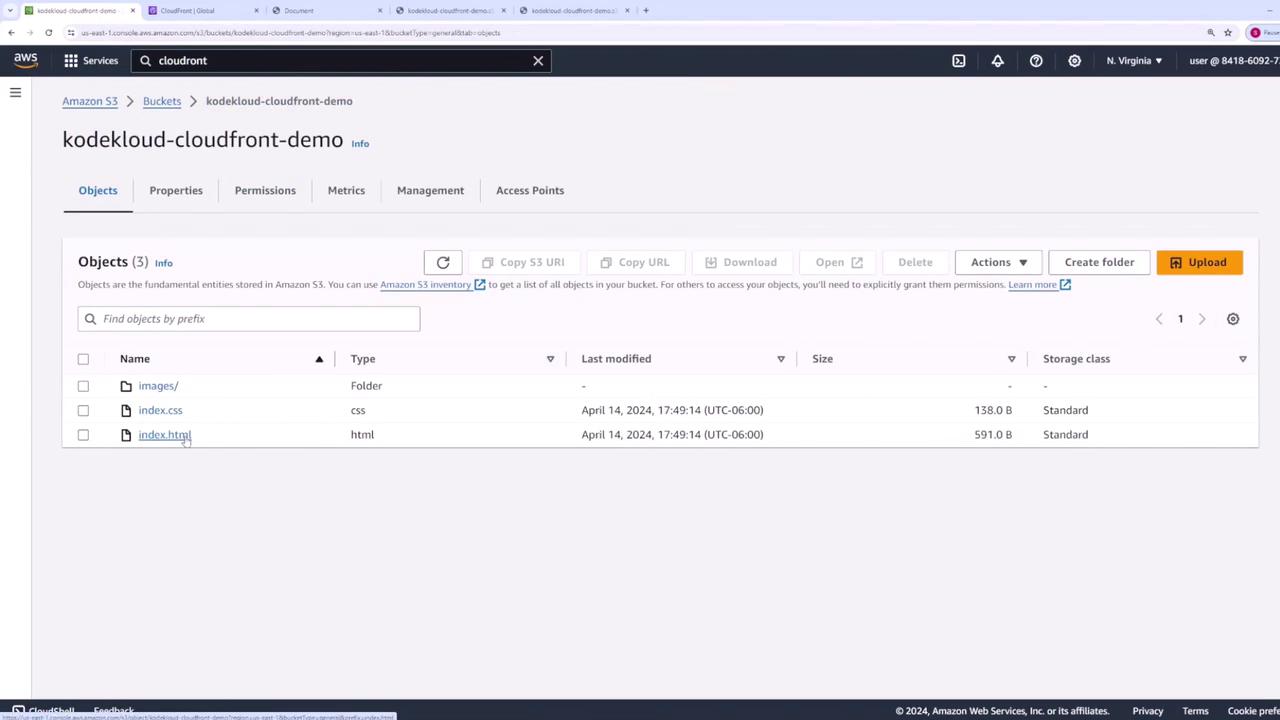
After creation, verify your bucket appears in the list:
- Click on your bucket name, then choose Upload. Add
index.html,index.css, and the entireimagesfolder.
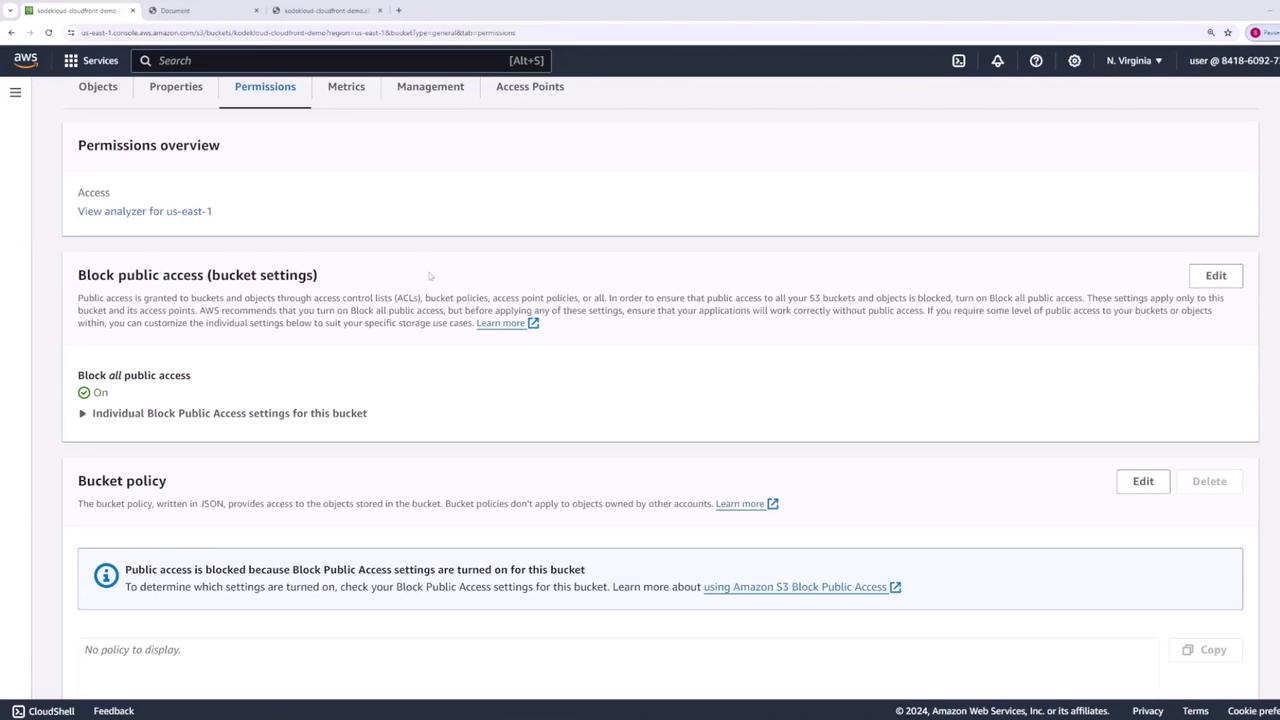
2. Secure Bucket Access
By default, S3 blocks public access to buckets:
3. Create a CloudFront Distribution
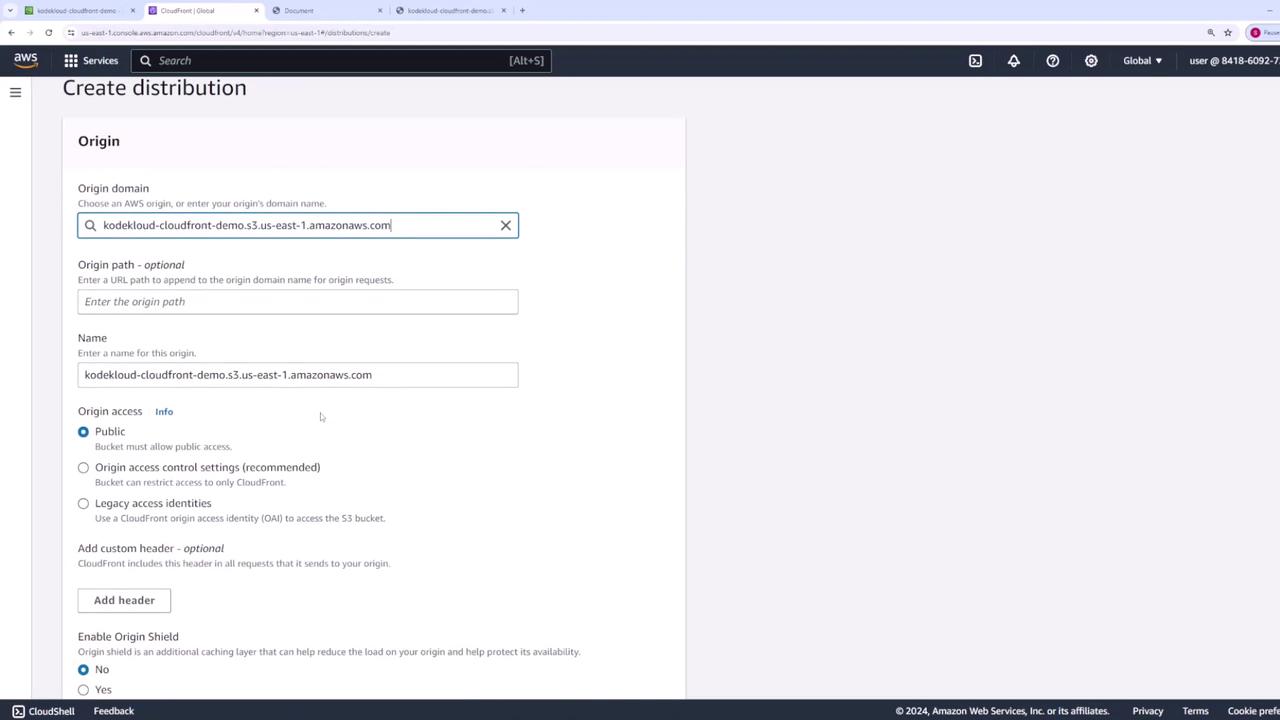
- Navigate to the CloudFront console, then click Create distribution → Get started under Web.
- For Origin domain, select your S3 bucket (
kodekloud-cloudfront-demo). - Leave Origin path blank unless you want to serve a subdirectory. Use the default Origin ID or customize it.
Scroll to other settings—most can remain at their defaults:
- Web Application Firewall: Disabled
- Price Class: Use all edge locations (Best Performance)
- SSL Certificate: Default CloudFront certificate (*.cloudfront.net)
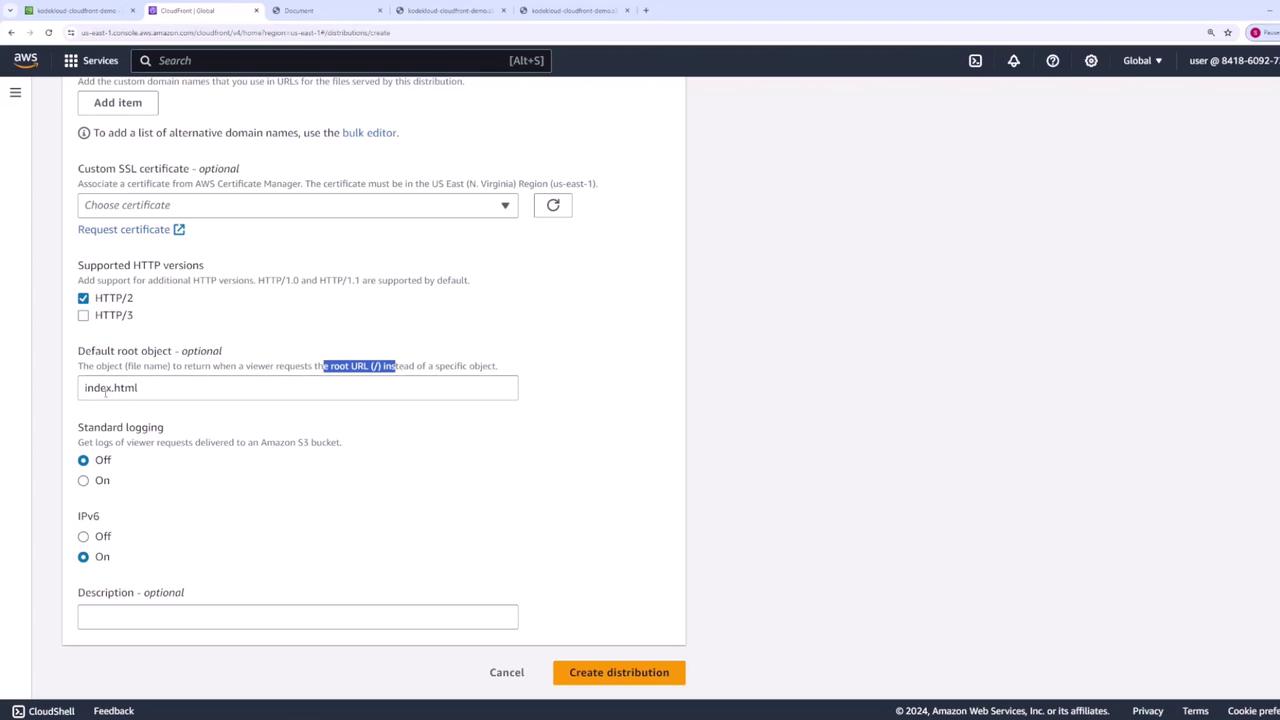
- Default Root Object: index.html

Why Set a Default Root Object?
When you request the root of a distribution (/), CloudFront needs to know which file to serve. By setting Default Root Object to index.html, you avoid typing the full filename in the URL.
Ensure Default Root Object is index.html:
- Click Create distribution. Distribution creation can take several minutes.
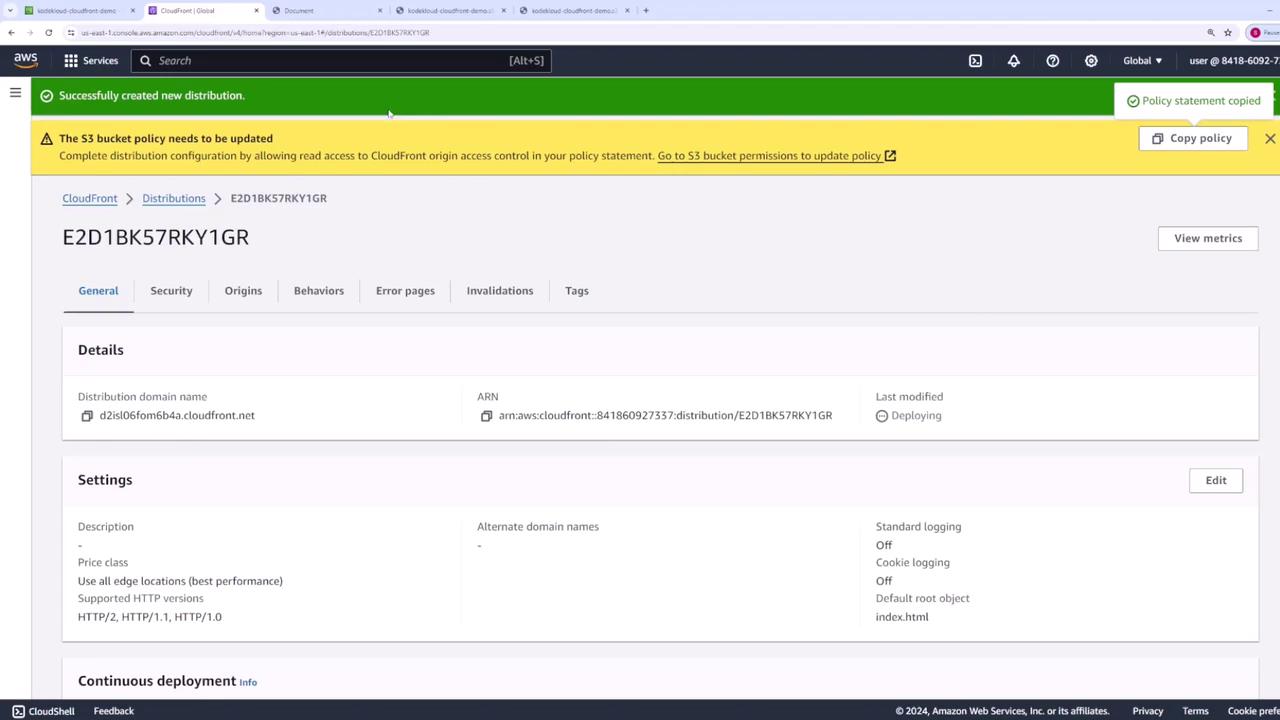
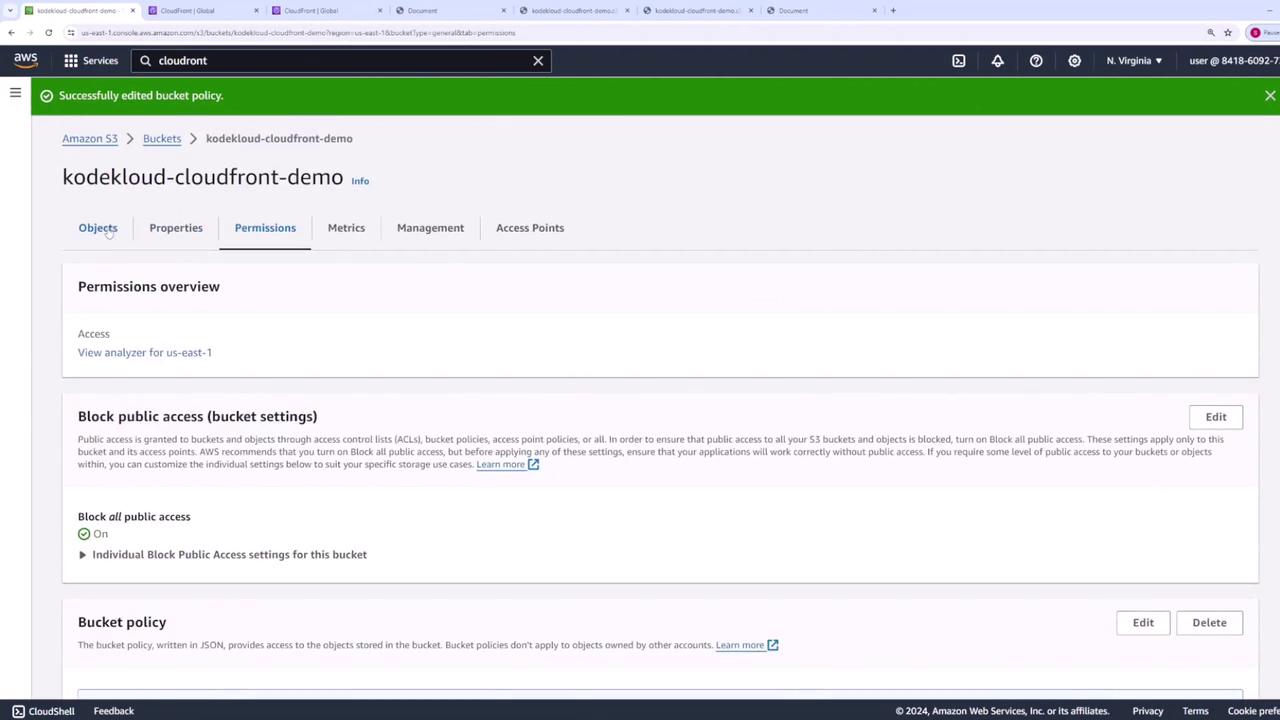
4. Apply an S3 Bucket Policy for CloudFront
To allow CloudFront to fetch objects without making the bucket public:
- In the CloudFront console, click the Copy Policy link from the warning banner.
- Go back to your S3 bucket’s Permissions tab → Bucket policy → Edit.
- Paste and save the following JSON (replace
kodekloud-cloudfront-demowith your bucket name):
```json theme={null} { "Version": "2008-10-17", "Id": "PolicyForCloudFrontPrivateContent", "Statement": [ { "Sid": "AllowCloudFrontServicePrincipal", "Effect": "Allow", "Principal": { "Service": "cloudfront.amazonaws.com" }, "Action": "s3:GetObject", "Resource": "arn:aws:s3:::kodekloud-cloudfront-demo/*" } ] }
If you wish to lock it down to a specific distribution, add a `Condition` block with your Distribution ARN:

```json  theme={null}
"Condition": {
  "StringEquals": {
    "AWS:SourceArn": "arn:aws:cloudfront:841860927337:distribution/E2D1BKS7RKY1GR"
  }
}
5. Validate Your Distribution
Once the distribution status is Enabled, copy its Domain Name (e.g., d111111abcdef8.cloudfront.net) and open it in a browser with a trailing slash:
text  theme={null}
https://d111111abcdef8.cloudfront.net/
- First request: CloudFront fetches content from S3.
- Subsequent requests: Content is served from the nearest edge location.
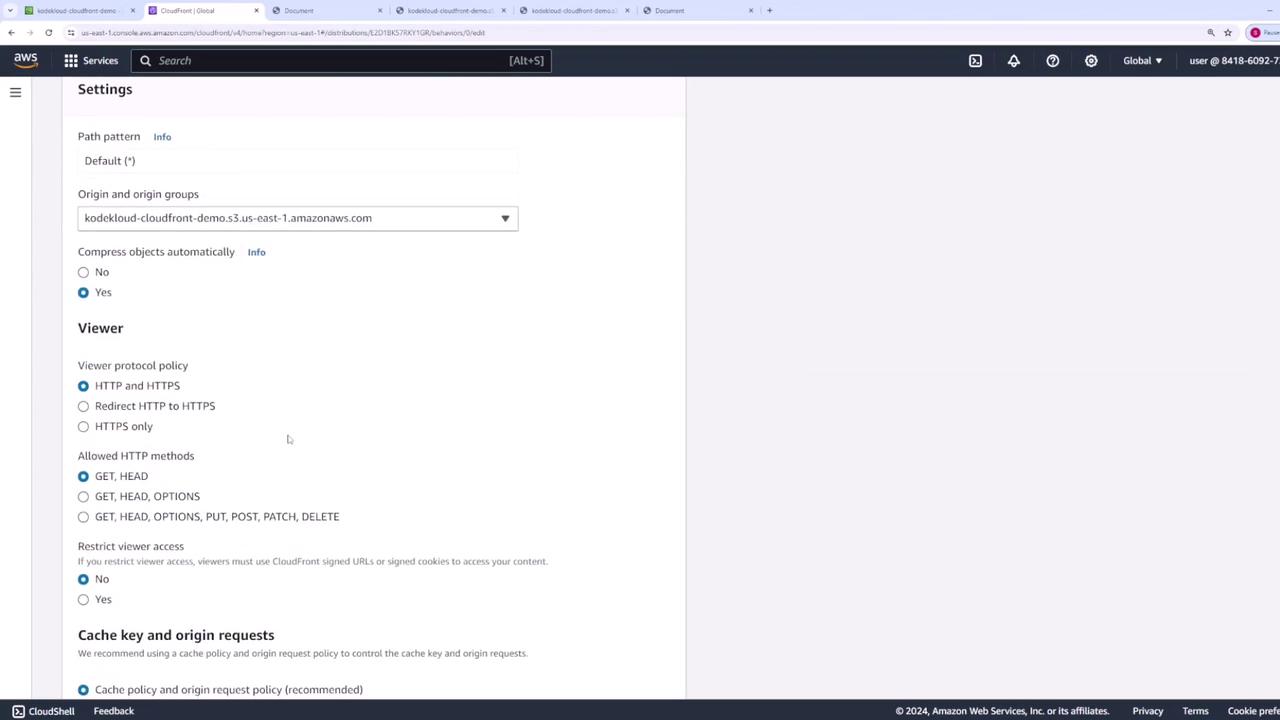
6. Review and Customize Cache Settings
By default, CloudFront applies the Managed-CachingOptimized policy with a 24 hour (86,400 s) TTL.
- In your distribution, go to the Behaviors tab and click Edit on the default behavior.
- Note the Cache policy in use (e.g.,
Managed-CachingOptimized). - Click View policy to inspect TTL values:

| Setting | Default | Description |
|---|---|---|
| Price Class | All edge locations | Global performance vs. cost. |
| Default Root Object | index.html | Serves root URL without a filename. |
| Cache Policy | Managed-CachingOptimized | TTL: 86,400 s (min/max can be customized). |
| SSL Certificate | Default CloudFront cert | HTTPS support for *.cloudfront.net. |
7. Invalidate Cached Objects
When you overwrite a file in S3 (e.g., update images/car.jpg), CloudFront may still serve the old version until its TTL expires:
To force CloudFront to fetch the updated file:
- In the CloudFront console, select your distribution and open Invalidations.
- Click Create invalidation, then specify paths:
text  theme={null}
   /images/car.jpg
   /images/*
   /*
Use wildcards to cover multiple objects.

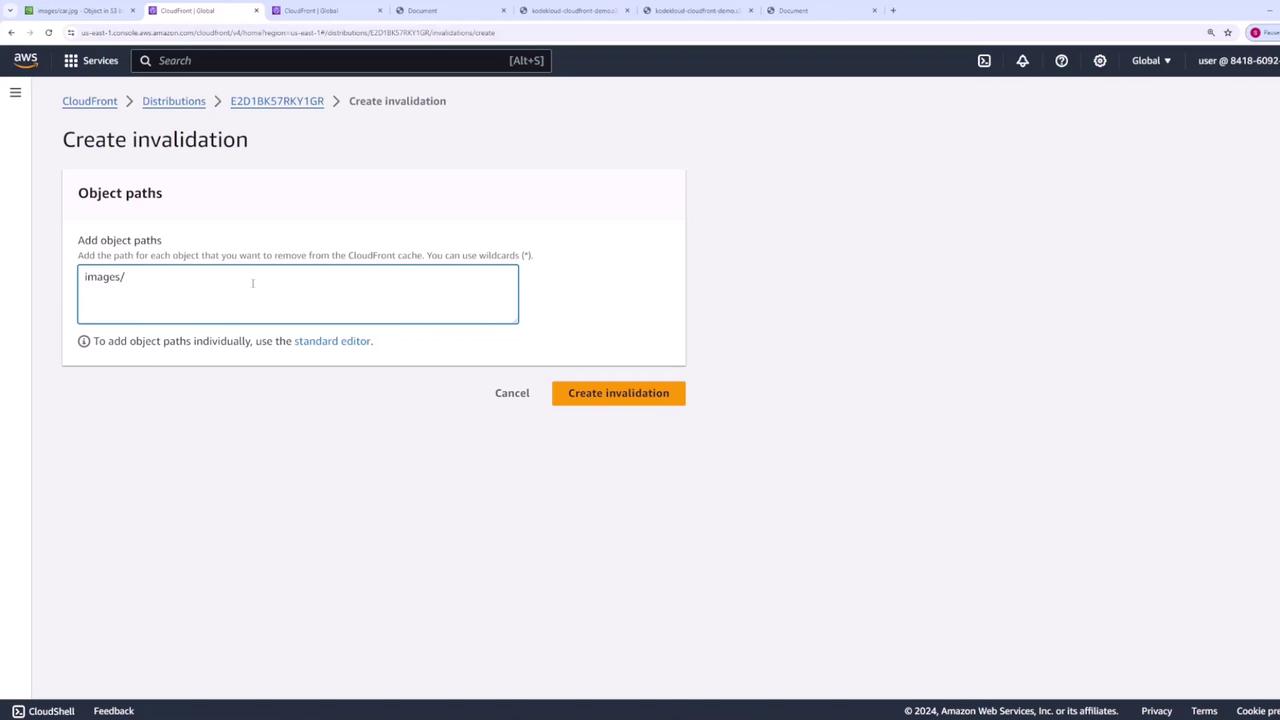
- Click Create invalidation. Once it completes, refresh your distribution URL to see the new image.
Next Steps
You’ve successfully deployed a static website with S3 and CloudFront. In future lessons, we’ll cover:
- Custom cache-key and origin-request policies
- Geographic restrictions and geo-blocking
- Using Lambda\@Edge for dynamic content transformations